
Creating period wood finishes for film and television scenery always involves a certain amount of subjective and creative interpretation. Usually the wood surfaces are finished to a level having more to do with the time period’s distance from modern times more than how old the set would look in relation to the time of the story. So usually anything set in ancient Roman times looks like it’s been through several hundred sandstorms, attacked with a grinder and sand blasted until the early growth rings are worn away from the late growth rings. There were certainly buildings that were very old at that time but there were plenty that looked much newer than the photo below.
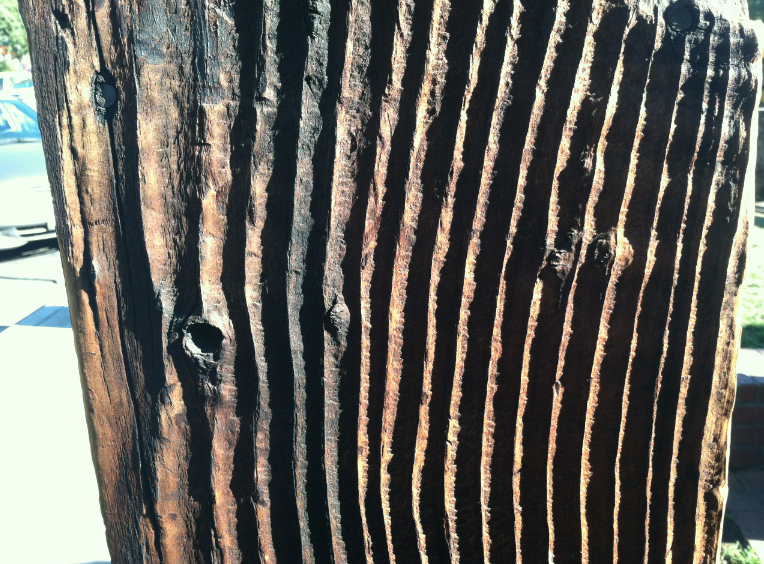
weathered wood showing sunken early growth rings
I was working on a period film several years ago and I noticed that one of the other designers had called out the wood surfaces of their set to be finished as ‘hand-hewn’. I knew the surfaces would have actually been surfaced to a finer finish than a rough hewn beam and I asked why it needed to be so rough. They answered that being pre-machine age, other than furniture which would have required lots of sandpaper, they wouldn’t have had the ability to give the wood a smooth finish. I said that not only was that not true, in many ways hand tools gave a superior finish to the tools of the machine age, and they had something better than sandpaper. They laughed until they realized I wasn’t kidding.
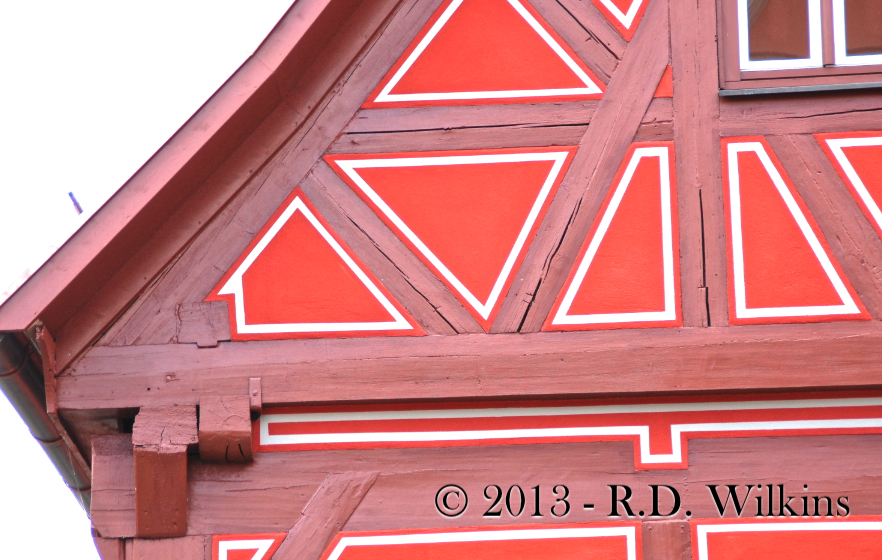
Let’s take timber framing. When most people think of a timber frame building they tend to think of the wood looking like this:

16th century German timber frame or Fachwerk house.
The wood didn’t look anything like this when it was built. The faces of the wood probably looked more like this (minus the checking or cracks):
restored German Fachwerk building from the mid 1600’s.
Partly because of this trend toward artistic license, and not understanding period construction which leads to misinterpreting the photographic research available (such as the photo below), wood buildings get designed and built with anachronistic finishes.
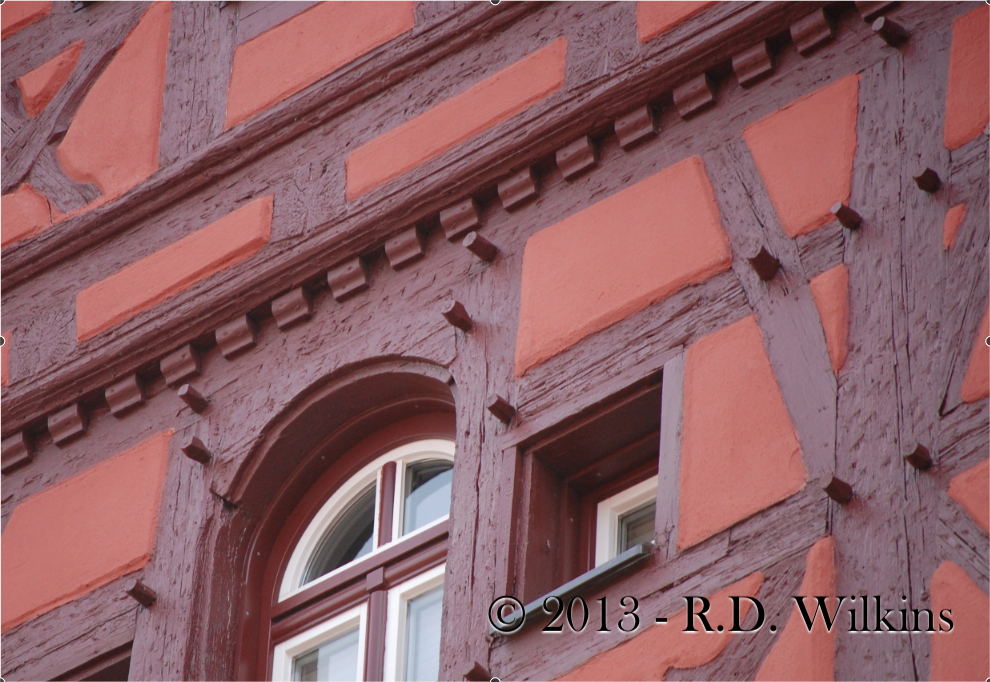
The timbers of this fachwerk building were originally as smooth as those in the previous example. Many years later the faces were scored to act as a grip for the
plaster stucco-like finish that was applied at one time to ‘modernize’ it, much like some old interior brick walls were scored to accept plaster.
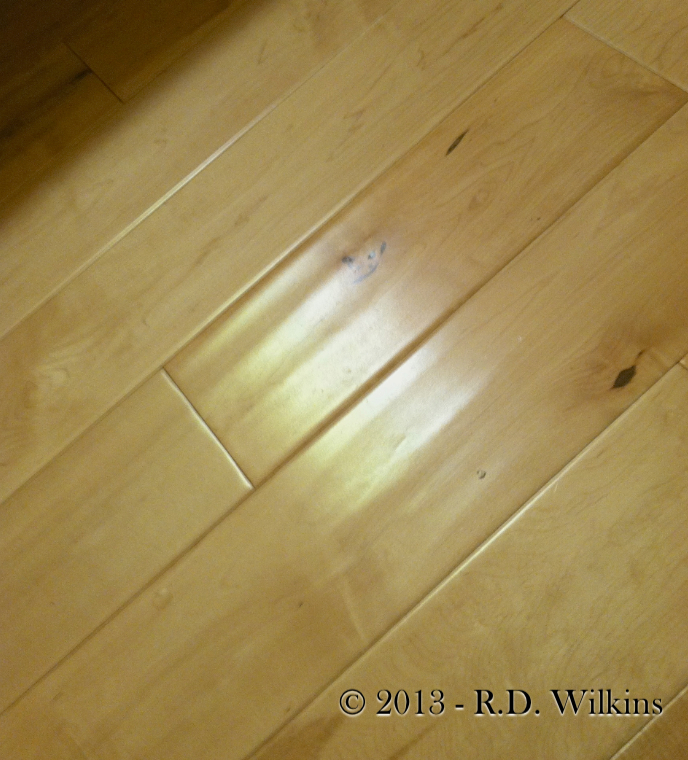
Even the building industry can take some of the blame. Here’s a photo of a popular flooring with a simulated jack plane finish. The plane had a curved blade that was used to quickly take a plank down before being planed smooth to its final thickness. A board with tool marks like this would not likely have been used in a decent dwelling.
Today it’s hard to imagine doing all the work involved in processing wood from logs to a finished form without power machinery. How could a hand tool created a finish smoother than a modern tool, much less sandpaper? first of all, the way the tools work today is much different than the way period tools work. And, because it was a much more labor-intensive process, they didn’t finish surfaces that wouldn’t be seen.
Let’s start with the big stuff. The process of taking logs from a tree to a piece of framing timber in the European tradition in the 16th and 17th centuries involved a number of types of hatchets.
Here’s a video by Christopher Schwarz on the use of hewing axes by Plimoth Plantation’s master joiner, Peter Follansbee:
By the 18th century the process involved not only the hewing axes and saws but an adze to square the sides followed by a broadax to smooth the sides, and possibly a drawknife to remove the axe and adze marks.
Here is a great little video by Ken Koons explaining the process:
Once the mortises and tenons were cut they were cleaned up and smoothed using chisels and slicks, which were basically large chisels meant to be pushed by hand rather than hit with a mallet. The photo below is of the largest slick in my collection. Made in the late 1860’s in Ohio, it has a 3 inch wide blade. This big blade is certainly closer to a chisel than an axe as you can see from the closeup of the blade as it shaves off a sliver of my thumbnail. The blade will leave a very smooth surface.

A three inch wide framing slick from the mid 1800’s

Here is a short video by John Neeman of a framing slick in use, you can see how quickly and cleanly it cuts a tenon.
Cut timber surfaces were as smooth as their maker wanted, or needed them to be. Here are two photos of the Daniel Trabue cabin near Lexington, KY. The cabin was restored some years ago and returned to it’s 1797 appearance. The clapboard which had been applied later had protected most of the logs from decay. Notice the tool marks on the exterior logs. Now look at the second picture of an interior wall on the second floor. Here the German maker has signed his name with an 18th century cipher. Notice how clear the signature is. It was made with a traditional crayon made of beeswax and powdered vermillion used for marking out work while building. The crayon was found during the restoration, tucked above the front door lintel. The clarity is only possible because the wood surface is so smooth.
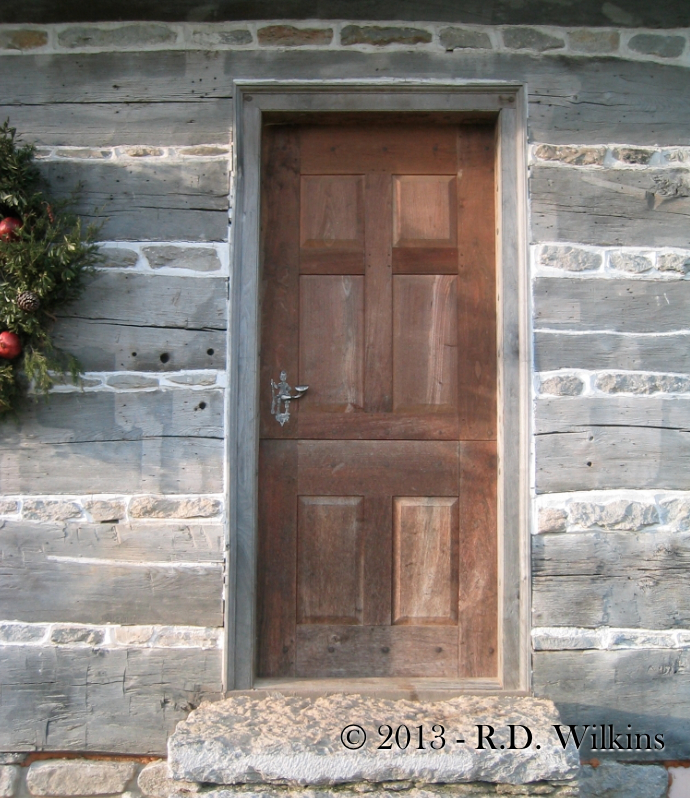
front door of the Daniel Trabue cabin
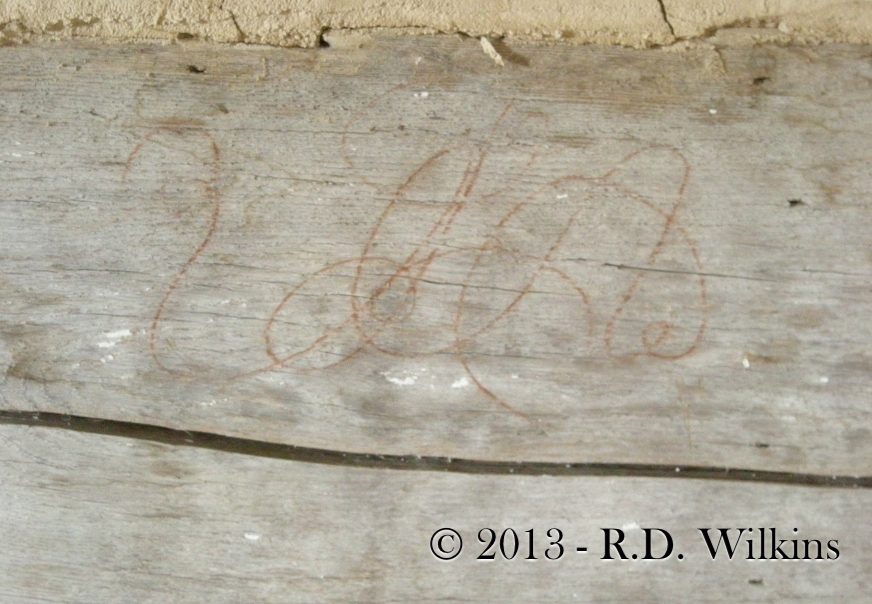
18th century cipher of the cabin’s builder
Next week, in Part 2 of this post I’ll talk about and show you how traditional hand tools can actually create a finish that’s superior to their modern day counterparts and why our ancestors didn’t use, or need sandpaper to surface wood. Also, you’ll learn why every recreation of Noah’s Ark you’ve ever seen is dead wrong.
