New 10-Week Set Design Fundamentals Course – 50% Off

One-Time Pre-Sale Offer

Wrand Productions announces it’s 10-Week Set Design Fundamentals Course at a Pre-Sale price of 50% off the regular price. This is the only time the series will be offered at this price and it will return to the normal price when the series begins on October 31.

This self-paced online series covers the fundamental skills that a Set Designer in the feature film and television industry here in Los Angeles are expected to have.

This is similar in difficulty to a one-semester graduate-level program at a university, but much of the material presented here is not covered at most colleges and is normally only available at the professional level. I’ve been developing this series for several years, basing it on classes I teach at the Art Directors Guild in Los Angeles.

Here is an outline of the material that will be covered in the series:

Week 1 – The Basics

Standard drafting conventions and symbols for set construction drawings. Set construction: typical flat construction techniques and variations.

Week 2 – Cameras & Optics

Understanding basic camera and lens terms: aspect ratios, focal length, depth of field, sensor sizes, exposure, stage lighting, using camera angle templates.

Scaling from photographs and artwork: calculating dimensions, understanding picture perspective and allowing for lens distortion.

Week 3 – Analyzing the Script / Reference Materials

How to break down a script for set design; using storyboards; techniques for estimating drawing time schedules.

References: using online, printed, and survey photo references; building a reference library on a budget.

Week 4 – Working Drawings

Step-by-step directions on creating proper construction drawings: plans and elevations; details, full-size details, and digital cut files; reflected ceilings and furniture plans; stage spotting plans, and director’s plans.

Week 5 – Door & Window Details

Diagrams and explanations of door and window construction and various adaptations for stage sets; creating accurate-looking period reconstructions; understanding, using, and sourcing hardware.

Week 6 – Stairways

The fundamentals of stair design: types of stairs, stair construction, how the choice of stair type affects design, and designing elliptical stairs.

Week 7 – Mouldings & Staff Elements

Understanding and using the Classical Orders of architecture; the proportions of mouldings based on style type; using a moulding catalog and creating built-up moulds.

Using plaster staff and compo elements in a set; designing with brick skins and textured surfaces.

Week 8 – Backings, Special Effects, & Visual Effects

Using painted and photo backings: The advantages and drawbacks of various types; creating custom backings; how to calculate correct placement distance from the set.

Special effects considerations: replicating fire, water, and wind effects; understanding legal requirements for special effects work on a sound stage; dealing with practical fireplaces.

Visual effects work: shooting with green or blue screens; using LED walls or volumes.

Week 9 – Backlots & Location Surveys

Shooting on studio backlots; shooting on location; proper surveying techniques; assembling a personal survey tool kit.

Week 10 – Physical Models

The advantages of physical study models; determining model scales; various model types and construction techniques.

Class Materials & Videos

Each week there will be tools, charts, and reference material to download as well as video instruction to help you do the exercises and create your portfolio drawings.

Along with the classes, you’ll have access to a private chat area that is only available to students of the series and alumnae who have taken courses previously. Here you’ll be able to meet other designers, discuss class material, get advice on your career, and exchange ideas and experiences from both the classes and real-world entertainment jobs.

Prerequisites:

– You must know how to draft. Drafting ability is essential to effectively completing the course and ending up with a set of professional quality working drawings. I’ll be offering a course on drafting later in 2022 to fulfill this prerequisite.

– Be familiar with CAD software  –  You are free to use any CAD software you are familiar with. Using software that you are still learning may make the lessons more challenging than you can handle. There is no standard drawing software in the entertainment industry as far as the Art Department is concerned. There are preferences among certain designers but one aspect of the job is a need to create files that can be used by many different other programs. 3D modeling won’t be required for any of the class projects but feel free to work that way if that is part of your usual design process.

There is a 14-day money-back guarantee from the time you begin the series if you change your mind. If you’re unsure about whether the series is right for you, you can schedule a free 15-minute discovery call to talk with me and I’ll be happy to answer any questions you might have.

Sign up for the course and learn more here.

Now In Print – The Art Of The Hollywood Backdrop

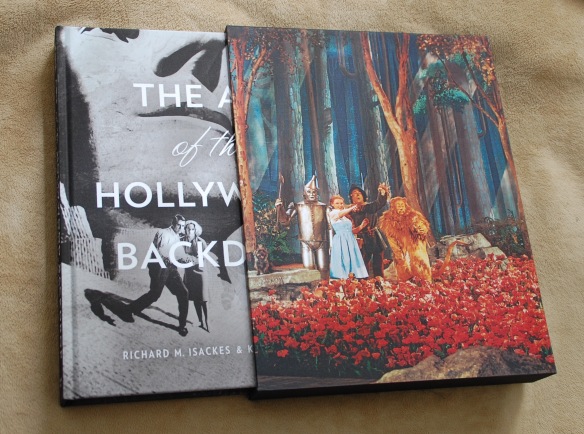
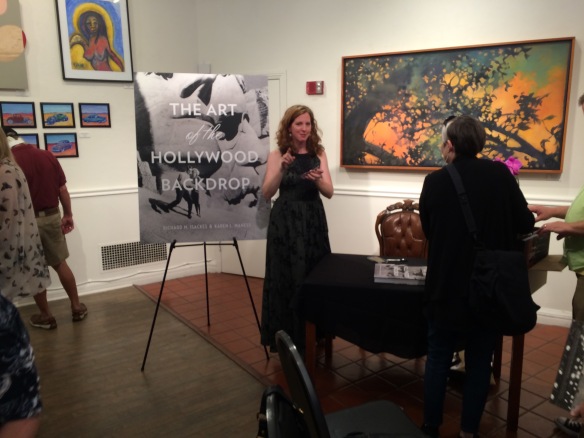
The Art Director’s Guild sponsored a book signing event at their gallery space in North Hollywood yesterday, with co-author Karen Maness on-hand to sign copies of the new book, The Art Of The Hollywood Backdrop.

img_0828


img_0815

The book is a cooperative project between the authors, Karen Maness and Richard Isackes and the Art Director’s Guild. With a focus on hand-painted rather than photographic backings, the book traces not only the history and development of backdrops through Hollywood films but the artists who have developed the techniques used and who have passed along that knowledge to successive generations of scenic artists.

dsc_0027

The event was well attended by not only Guild members but by members of the Strang family and the Coakley family of J.C. Backings, the two families which have not only dominated the field in Hollywood but have been the biggest promoters and curators of the art form.

The Coakley family and fellow artists of J.C.Backings

The Coakley family and fellow artists of J.C.Backings


Co-author Karen Maness graciously signed books all afternoon.

Co-author Karen Maness graciously signed books all afternoon.

This is a big book, and I say that in every sense of the word. Larger than a quarto format at 11 x 14 inches, the hard-cover and cased edition is 352 pages long and weighs in at 13 pounds. Filled with crisp images of both black and white and full-color backings, the photos show the backings not only in a straight-on form but in the environment that they were meant for.  It’s filled with stills from the original films as well as set stills showing them in relationship to the sound stages and the companion scenery.

dsc_0033


dsc_0032This book will definitely appeal to film lovers who have very little understanding of film scenery and stagecraft as well as film professionals who have many films to their credit.

It is available for order through the publisher’s website and will soon make it’s way into bookstores. If you are still making that holiday gift list, this is definitely a book that will have huge appeal to anyone who loves movies. Read an excerpt here, and you can order the book here from Regan Arts.


The Original Pre-Viz Tool – A DIY Lens Angle Calculator


Some of my collection of traditional studio lens angle templates. The ones on the left are for long lenses while the ones on the right are wide-angle lens. The third from the left is a zoom lens template.

Some of my collection of traditional studio lens angle templates. The ones on the left are for long lenses while the ones on the right are wide-angle lens. The third from the left is a zoom lens template.


Pre-vis Before Previs

Before the term “Pre-visualization” ever existed, there was the lens angle template. These were a staple of any Hollywood studio Art Department and were used when laying out a set to determine camera angles, backing sizes needed, rear projection screens and planning back-projected set illustrations for the producer and director to approve sets long before there were 3D computer programs.

There was a time when a basic knowledge of optics and lenses was considered mandatory and was necessary not only because the Art Director would design the sets to be shot in a specific way but this information was needed when designing effects shots such as forced perspective sets, glass shots and the like.

Todd AO template

A template for a 100mm to 300mm zoom lens in the Todd AO format. Todd AO was an early 70mm film format with an aspect ratio of 2.20.

The templates were for a single lens, usually a prime lens, and were made using 1/8″ or 1/4″ thick plexiglas. The projection lines were scratched or engraved into the acrylic, sometimes by a Set Designer but other times they were made by the studio sign shop. Some of my examples are obviously done with a hand held engraving tool while others have been done with a lettering template and have inked letters.

Todd AO lens template

Each template had two sets of projection lines, one set for the horizontal plane (for use with a plan view) and another for the vertical plane, for use with scale room elevations. Most are made for use with 1/4″ scale drawings but they are accurate for any orthographic drawing because the angle is unaffected by the scale. Most will have markings to note the distances from the lens entrance pupil in 1/4″ scale.

angle of view

The “Quick View”

By the 1990’s, there were so many different formats and lens combinations most of us in the Art Department in Hollywood carried thick manila envelopes of acetates of the various focal lengths, but I always seemed to be missing one that I needed and I found some were inaccurate from being cloned so many times. In 1998 I designed a device that had all the available formats and prime lenses  so you could just dial up the one you needed. I redesigned it in 2008 to include the digital formats but sold out of them a year ago.

I stopped having them made since they were expensive but hated to see them become obsolete since they are still so useful. For a director, they are the perfect way to see if a shot is possible at a location or see the limitations of a particular lens on a set when you can’t rely on wild walls.

Making A Quick View

Yours won’t be on Lexan like the originals were but will be sturdy enough plus cheap enough to replace if it’s damaged or lost. Download the files below and take them to your nearest copy center and have both the dial and the nomen printed on clear acetate. They don’t have to be printed at exactly 100% but they should be at the same scale to each other. Then you just line up the center marks and use a compass point or push pin to pierce the centers, creating a pivot point in place of the brass rivet as in the photo above.

The diagrams from the original instruction manual will explain how to use them. You’ll note that I’ve added a feature that wasn’t on the originals, a protractor which will tell you the angle of a selected lens.

Quick View II User Manual_2

Quick View II User Manual_3

QuickViewII_nomen

QuickViewII_dial

Last Minute Holiday Gifts For Set Designers

Beware. This is what happens when you give a set designer a crappy holiday gift. source: Awkwardfamilyphotos.com

Beware. This is what happens when you give a set designer a crappy holiday gift. source: Awkwardfamilyphotos.com

So, it’s just 12 days until Hanukkah and 13 until Christmas and you still haven’t gotten that special set designer in your life a gift. You could just give up in defeat and buy them that same aged cheddar cheese sampler you got them last year, ( which they carefully hid underneath your car seat and is the reason it smells like mold inside ) or you can get them something decent like one of the the items on the list below. At this point you’re probably going to have to resort to hideously expensive 2nd day air shipping, but who’s fault is that??

Best Value  –  Spike GPS device for smartphones and tablets – $299

The Spike GPS device for smartphones and tablets

The Spike GPS device for smartphones and tablets

That may sound like a lot of money but that’s 50% off the introductory price of $619. I got one of these during their Kickstarter program in 2013 and have been thrilled with it. This device does everything my $500 Bushnell rangefinder does and a lot more. Take a photo of a building up to 200 meters away and then take measurements off the screen, even after you’re back at the office, even weeks later. Easily get accurate heights, door and window sizes, measure billboards, estimate square footage. You can instantly send the photo to someone else with the measurements, GPS coordinates and square footage. Soon to come are the capability to turn your shots into a Sketchup model and point cloud scanning of irregular shapes. For iOS and Android devices.

This offer is only good until December 23 with the offer code FRIENDSOFIKE14.

By Hand & Eye – $16.00

BHAE_scan_cover_500_1024x1024

Another gem from Lost Art Press, this is probably one of the best design books written in the last 100 years. It outlines the world of design without a rule and using only dividers and proportional methods. I covered this in a previous post and always recommend it. It’s so popular that it’s currently out of print and only a digital version is available. Buy them this and a good pair of second hand dividers from Ebay and you will completely change the way they think about design.

Drafting Apron – $25.95

apron1

Harkens back to the days of graphite dust, arm protectors and a time when you didn’t have to worry about hours of work disappearing from a computer failure. Hide a box of Tombow pencils in the pocket and watch them weep with joy.


WE Wood Watches – $75 to $150

we wood watches

WE Wood watches are beautiful analogue timepieces made from a number of hardwoods and use precision movements. Each one is absolutely unique due to it’s wood case.They’ll have something nice to look at while they’re waiting for their render to finish or that endless production meeting to come to an end.

FastCap ProCarpenter Lefty/Righty Tape Measure – $8.99

29855-01-1000

Most measuring mistakes that occur while doing a survey come from misreading numbers upside down when you’re measuring from right to left. This tape solves that problem by having the numbers read correctly no matter which way you hold it. The same company also makes the Flatback tape which works like a flexible story pole, making it possible to easily measure round objects. You need this.


 Magna Tip – $2.49

MagnaTip

This little guy will save you when you’re surveying alone and have a metal surface to stick it to. It attaches to the end of most 1″ wide tape measure and becomes a third hand. Especially good if you’re trying to measure something overhead. A great stocking stuffer.


Tape Tip – $4.95

Tape tip

Another little device that’s a lifesaver when you’re trying to measure inside corners. Attaches to the ends of most tapes. Inexpensive enough you can buy one for your whole art department.

GripTip – $3.00 for two

Unknown

OK, you’re saying, enough with the survey stuff. But this little gadget will save you someday when you’re trying to measure that stone or brick wall and the end of your tape keeps slipping off. The serrated edge will bite into just about anything and stop the cursing fast! At $3.00 for two, you can afford to have several in your kit.

Smartphone Projector – $27

smartphone projector

For the gadget lover, this is a low-tech projector option that works with palm-size smart phones, not the phablets. Made from cardboard, the device works with simple lens physics as the image and light from the phone is projected by way of a convex lens onto any white surface up to 6 feet away. You’ll need a dark room though, it won’t work in a brightly lit space. A great way to share when you don’t happen to have a 27″ monitor in your bag.

Geometrigraph – $14.95

Geometrigraph set

First manufactured in the late 1800s, these two stainless-steel templates were designed to make it possible to create curved, parallel or perpendicular lines as well as circles, angles and a range of polygons from 3-sided to 20-sided. By using the inset shapes of various curvatures with the circles and polygons, you can create an unlimited variety of ornamental designs.  All this can be done without using any other drawing instruments; all that is needed is paper, a pin, and a sharp pencil or fine-tip ballpoint pen. Two nickel-plated steel T-head anchor pins are included.  The templates are suitable for designers of inlay in wood, graphic artists, quilters, sign-makers, innovative youngsters, etc. The set comes with a 16-page instruction booklet explaining the various uses as well as showing numerous examples of typical designs. Remember the Spirograph? Well this is it’s Granddad.

Tape Measure Uniform – $42.00

GetImage.ashx

For those times when you need to stand out and let people know there’s a Art Department professional on the job. Or, more likely what it will be saying about you is, “Yes, I am a proud member of the Art Department and I have gone completely insane from breathing Spray77 and Zip Kicker fumes, living on stale coffee, doing endless revisions and dealing with constant software issues. So just stay away from me and no one will get hurt.”


Really, Really Last Minute Gifts

When you realize you’ve really screwed up and forgotten someone and have no time to run to the store, much less order anything, you can always gift a good app.

Log onto the Apple or Android store and gift your so-important-you-forgot-about-them friend one of these apps and your reputation will be saved:

I own and can recommend all these apps.

BuildCalc – construction calculator – $19.99

Magic Plan – indoor mapping, survey tool – free, pay per use

Photo Measures – saving and sharing measurements – $6.99

Artemis – professional director’s finder – $29.99 *

pCAM – camera info calculator – $29.95 *

Sun Surveyor – sun and moon calculator – $6.99

Stereo Calc – 3D stereo film calculator – $39.99 *

Moviola Pro Camera Guide – extensive database of camera info – $3.99 *

I.D. Wood – samples and data for 200 kinds of wood – $4.99

* iOS versions only


Exhibition Of German Expressionist Film Artwork Now At LACMA

IMG_6069

At the Los Angeles County Museum Of Art now until April is a special exhibition of artwork and posters from the German Expressionist period of the silent film era, 1919 to the mid 1930’s. Produced in association with  La Cinémathèque Française and the Academy Of Motion Picture Arts And Sciences, the show features over 150 pieces of artwork from classic films of the German UFA studio.

Along with many posters are a large number of original set and costume design drawings which are seen together for the first time here. Most of which have not been on display here before and others only seen as small images in publications.

Of course artwork from the most well-known films are there; The Cabinet Of Dr. Caligari, Metropolis, The Nibelungen, but there are many others from more obscure films as well including Robert Hearlth’s original schematic of the forced perspective backings from Der Letzte Mann which were such a sensation.

One of Ernst Stern's drawings for Waxworks, which indicates the set design, platforming, camera position and lighting.

One of Ernst Stern’s drawings for Waxworks, which indicates the set design, platforming, camera position and lighting.

A watercolor and charcoal drawing for one of the sets for Dr. Caligari by Walter Röhrig

A watercolor and charcoal drawing for one of the sets for Dr. Caligari by Walter Röhrig

It was common during this period of German cinema for Art Directors to work in teams of two or three people, dividing the design duties among themselves as matched their individual abilities. A perfect example of this is the work of Otto Hunte and Erich Kettelhut on Fritz Lang’s The Nibelungen. Here is a drawing by Hunte of the dragon by the waterfall.

Gouache painting of the dragon for Die Nibelungen by Otto Hunte.

Gouache painting of the dragon for Die Nibelungen by Otto Hunte.

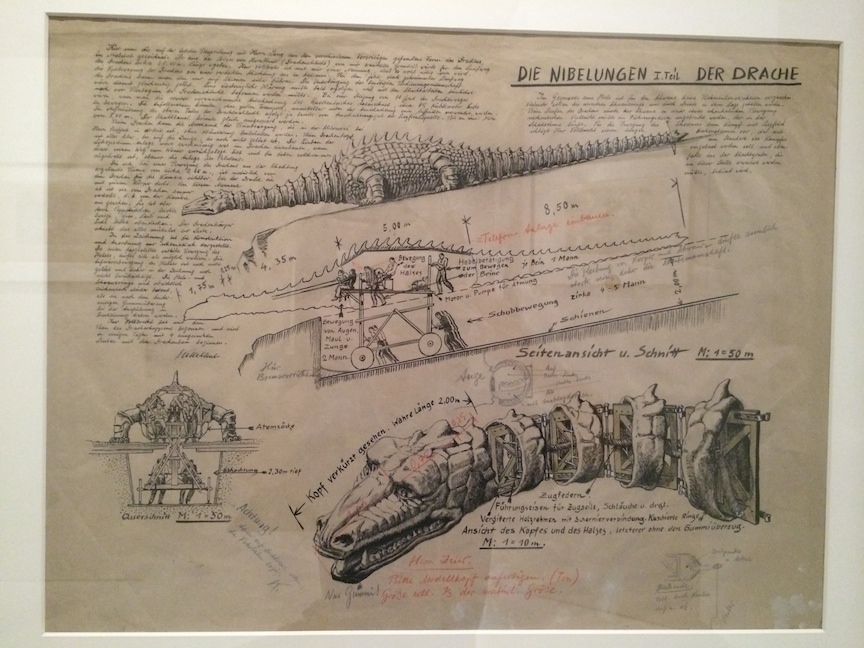
Being the more technically trained, Kettelhut elaborated on the design by drawing the technical requirements of the dragon to carry out the action called out in the script.

Technical drawing of the Dragon by Erich Kettelhut

Technical drawing of the Dragon by Erich Kettelhut

Kettelhut carefully described how the giant action prop was to be built and operated both with stage requirements as well as the on-board personnel’s responsibilities.

drawing describing how each part of the dragon was to be operated by stagehands.

Enlargement of Kettelhut’s drawing describing how each part of the dragon was to be operated by stagehands.

The size and depth of the recessed path required for the props operators.

The size and depth of the recessed path required for the props operators.

Kettelhut called out the length of the neck as well as the tension springs, framework, control cables and hoses required for the creatures fiery breath. He calls out "only rubber!" for the mouth area.

Kettelhut called out the length of the neck as well as the eye detail, tension springs, framework, control cables and hoses required for the creatures fiery breath. He calls out “only rubber!” for the mouth area.


Here is the scene from the film where Siegfried finds and kills the dragon. The effect is quite crude by our modern film standards but must have been thrilling for a public new to such spectacles. Imagine the lot of the half dozen stagehands stuck inside the big, airless prop as it bellows smoke from inside it. Notice the large forest and mountain sets created for the film, truly epic efforts for the time.

What Lens Is It? Comparing Apple Device Cameras To 35mm Lenses

A lot of times when you’re using your smart phone camera to take a shot of a set or location it would be nice to know what the equivalent view would be with a 35mm cinema / video lens.

I ran the numbers for most Apple devices and came up with the following equivalent focal lengths for both 35mm still cameras (full frame) and Super 35mm size sensors. Remember that although both formats are based on 35mm film stock, the frame for a still camera is a 1.5 aspect ratio with a frame width of about 1.417 inches. A Super 35mm frame is a 1.35 aspect ratio and the frame width is .980 inches.

Why only Apple? Well, the company readily makes their devices lens and sensor data available and it was easy to calculate. In the next post I’ll show you how to measure for your devices’ angle of view if the exact focal length isn’t published.

Please note in the following table the focal lengths for the given device have been rounded up to the nearest whole number so the equivalent lengths given are approximate.

Apple device lens comparison chart