Designing For The Camera – Understanding Cameras & lenses

New Master Class – Pre-Sale at 50% Off Until May 15

Until now, no one has created a class that explains cameras to designers.

You’ll not only learn the technical information that will help you understand the mechanic of cameras and optics, but you’ll learn how they capture your scenery and how they can affect your design decisions.

Image: Warner Bros Studios

As a film designer you must understand how cameras capture and record images, because that’s how the audience sees and experiences your work.

Few if any film design schools include optics as part of the curriculum leaving film designers with a huge disadvantage when working with the cinematographer on a new project.  The information in this course will help you create effective and believable sets that help the camera tell the film’s visual story as successfully as possible.

Image: Netflix

With this course, you will be able to discuss the camera requirements for your sets with the cinematographer and visual effects supervisor and not be excluded from important decisions that affect your designs. It will further your knowledge for a successful career in the Art Department as a set designer, art director, or production designer.

What you’ll learn in this course:

  • Cameras – Film vs. Digital
  • Lenses – spherical vs. anamorphic, prime vs. zoom
  • Specialty lenses – lenses and attachments that solve tricky shooting issues
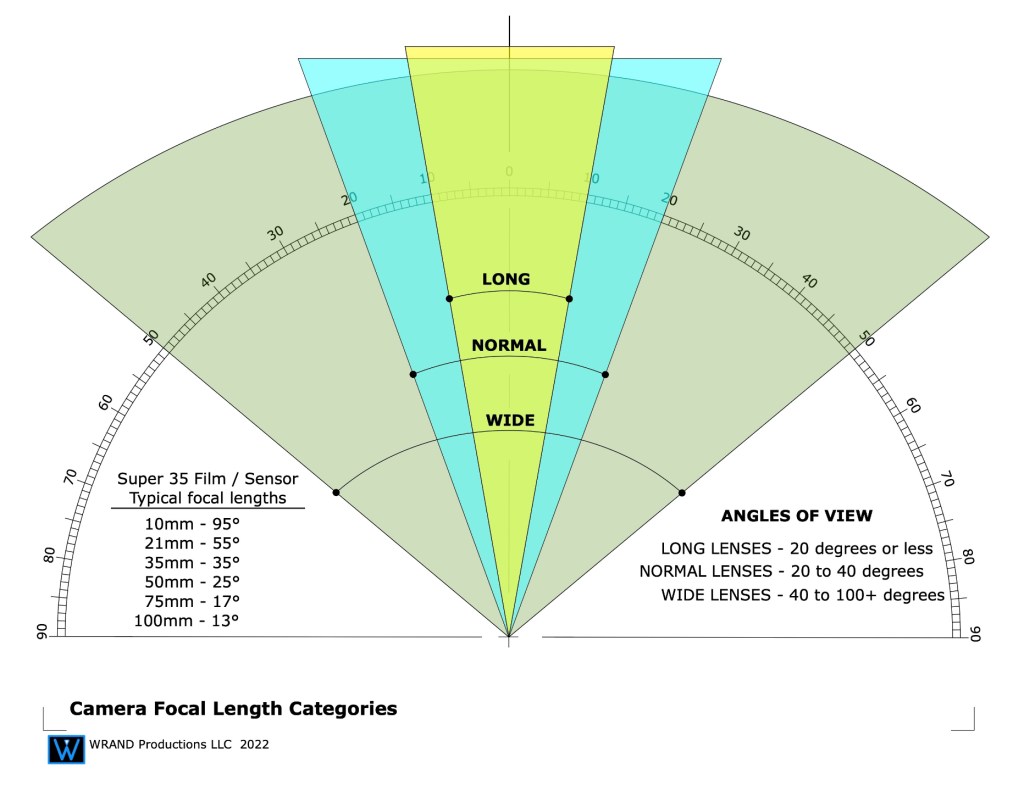
  • Understanding focal lengths
  • Understanding depth-of-field
  • Aperture settings – F-stops vs. T-stops
  •  Dynamic range – over and under exposure comparisons
  • Lighting – color temperature, typical lighting styles
  • The Inverse square law of lighting
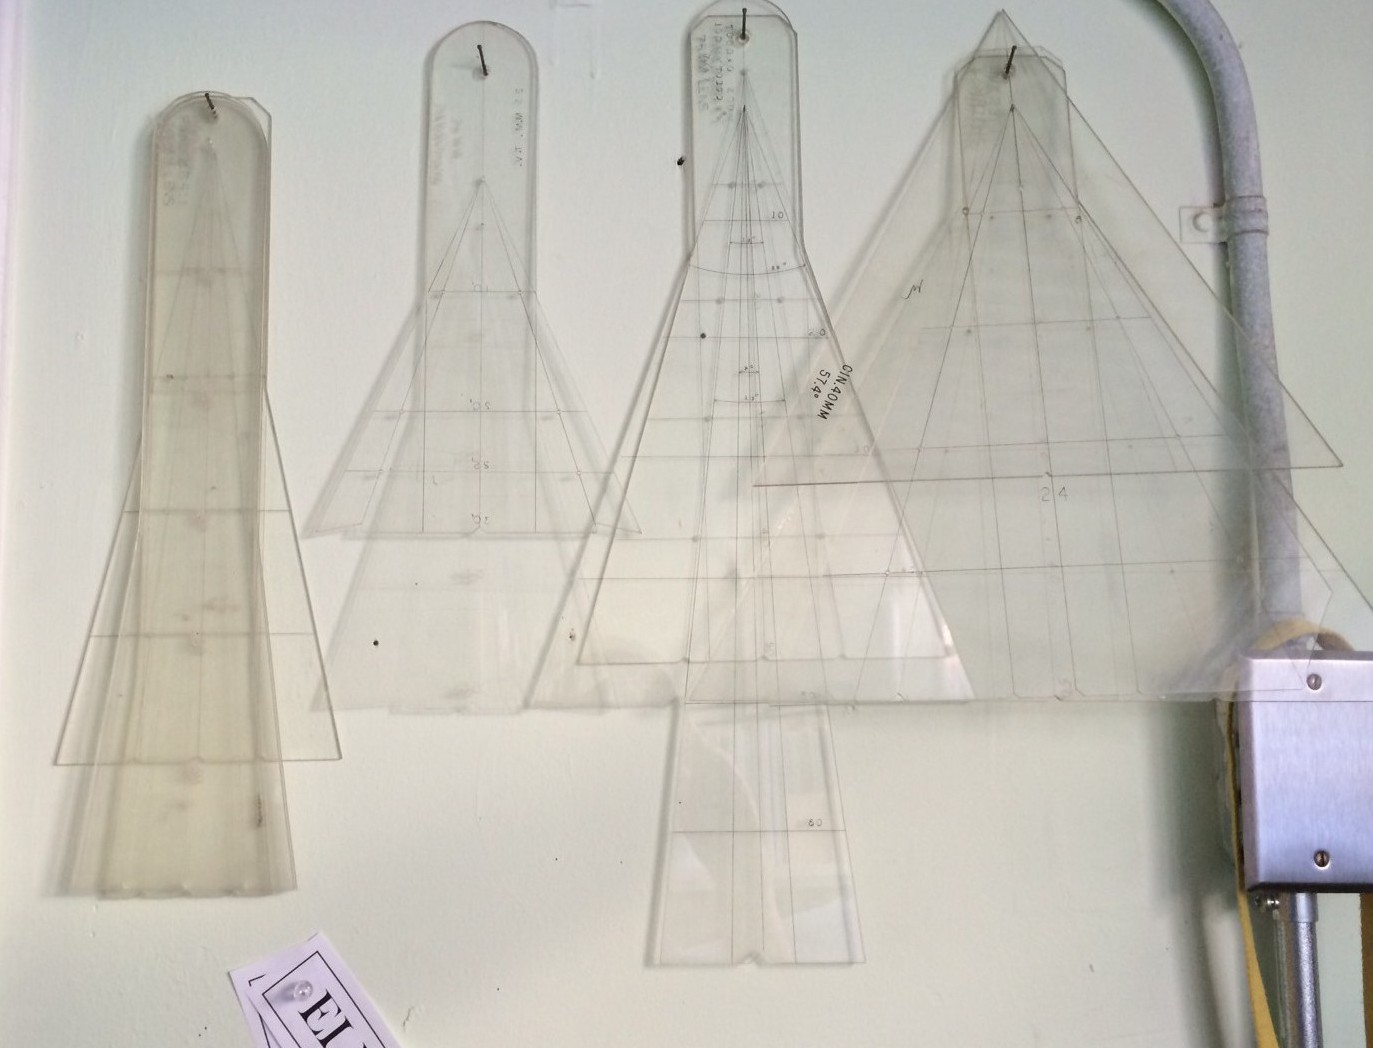
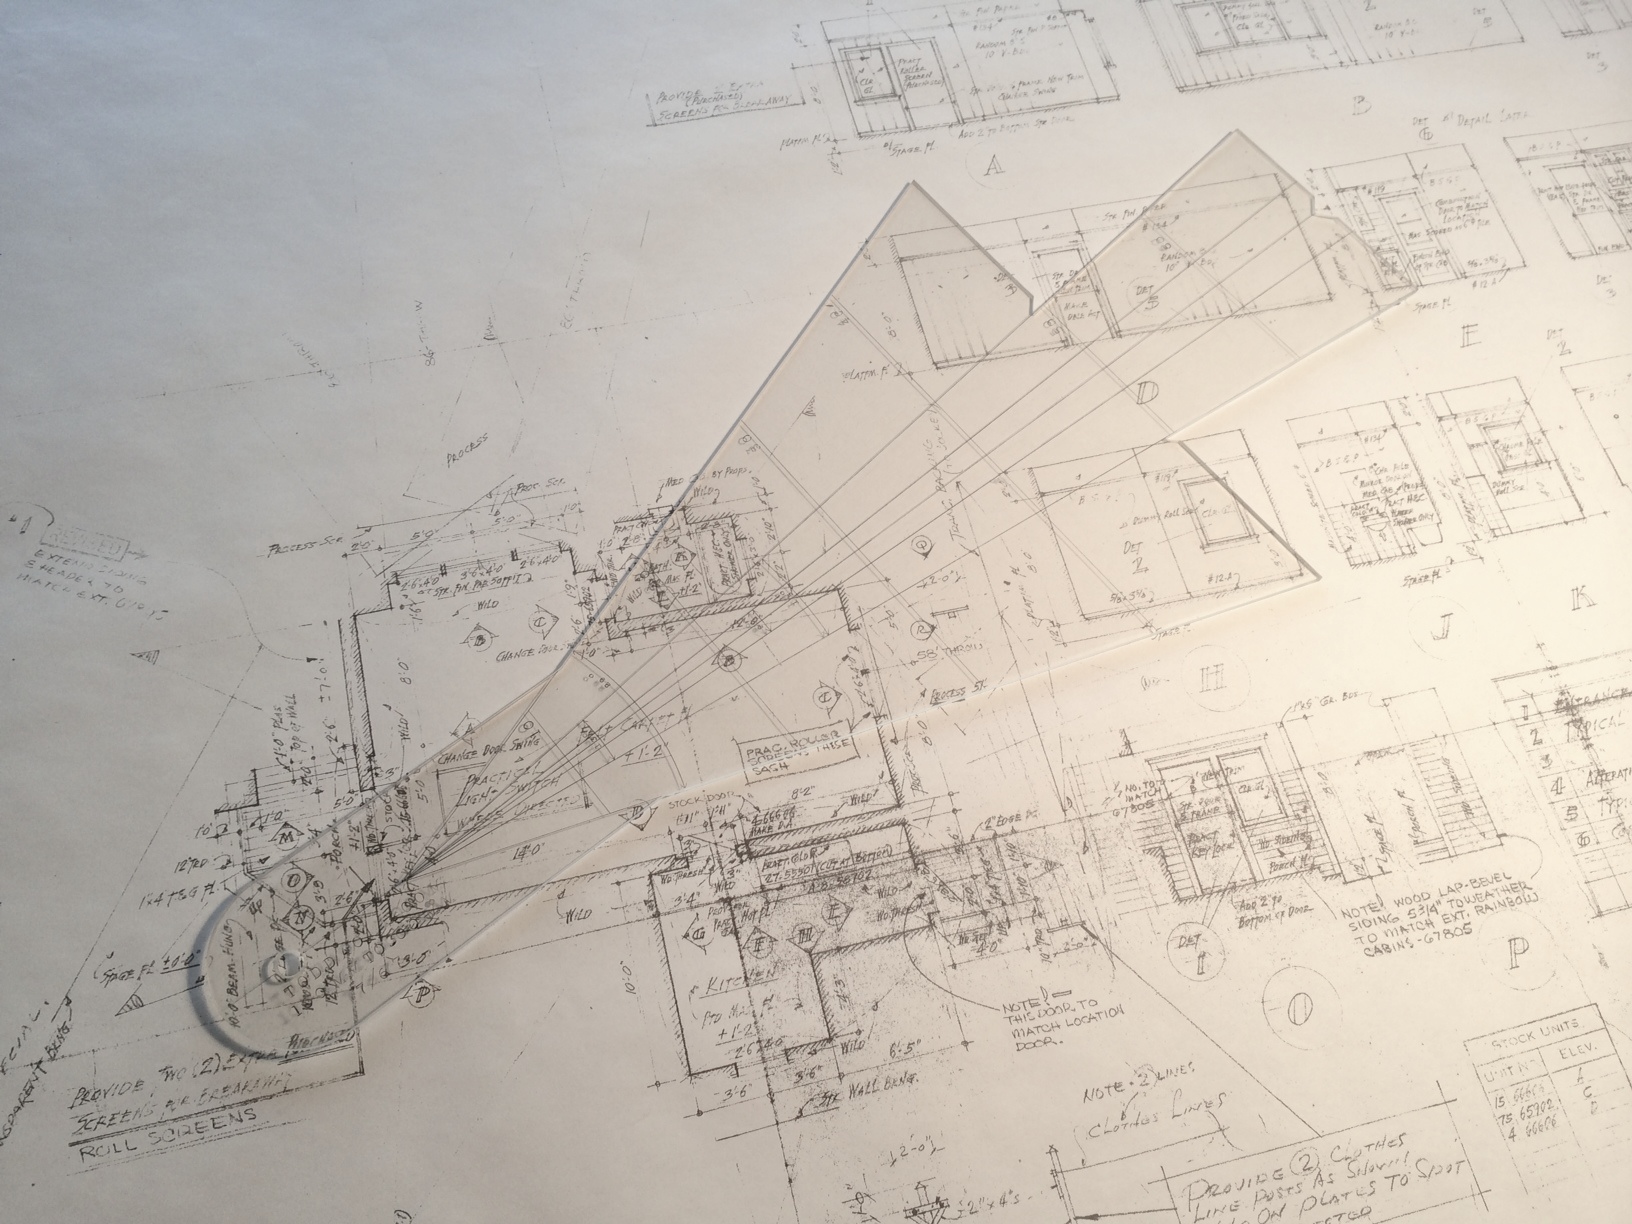
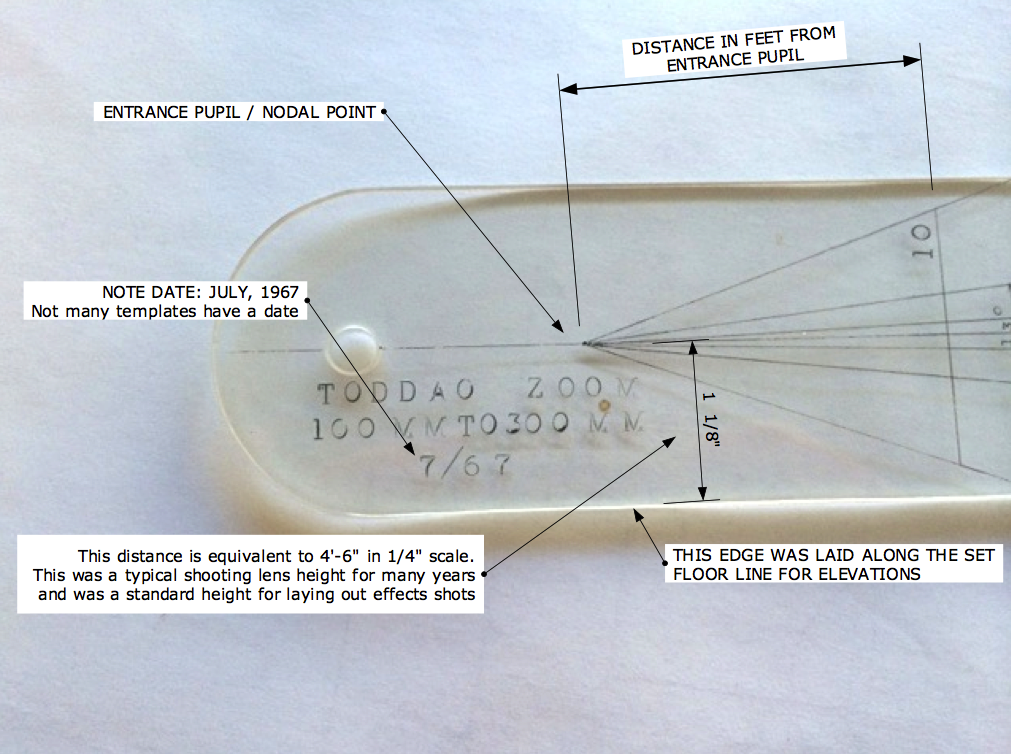
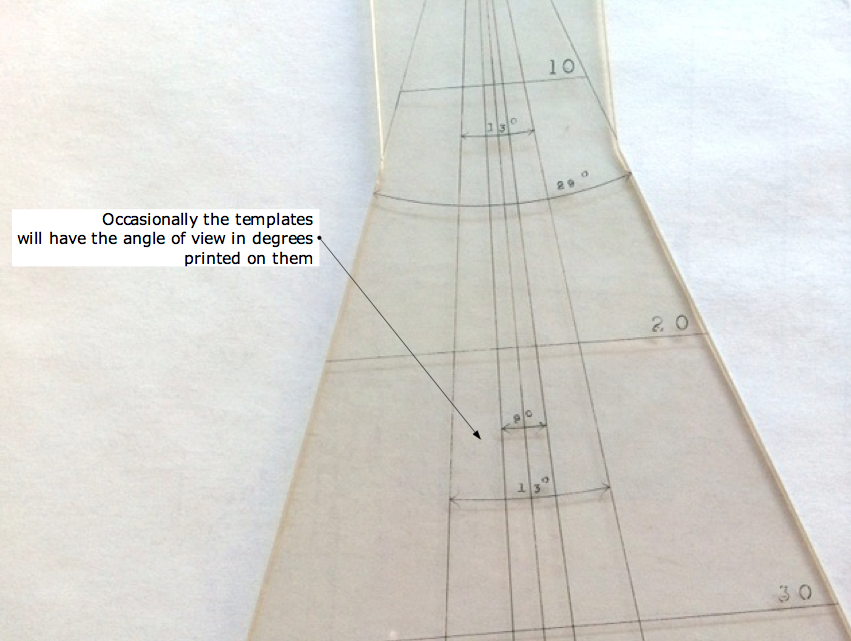
  • The basics of optics for in-camera effects such as foreground  miniatures and forced perspective sets.
  • Understanding color grading vs. color correction,  and digital intermediates or D.I.’s
  • Why is resolution important? Understanding the race for more pixel depth.
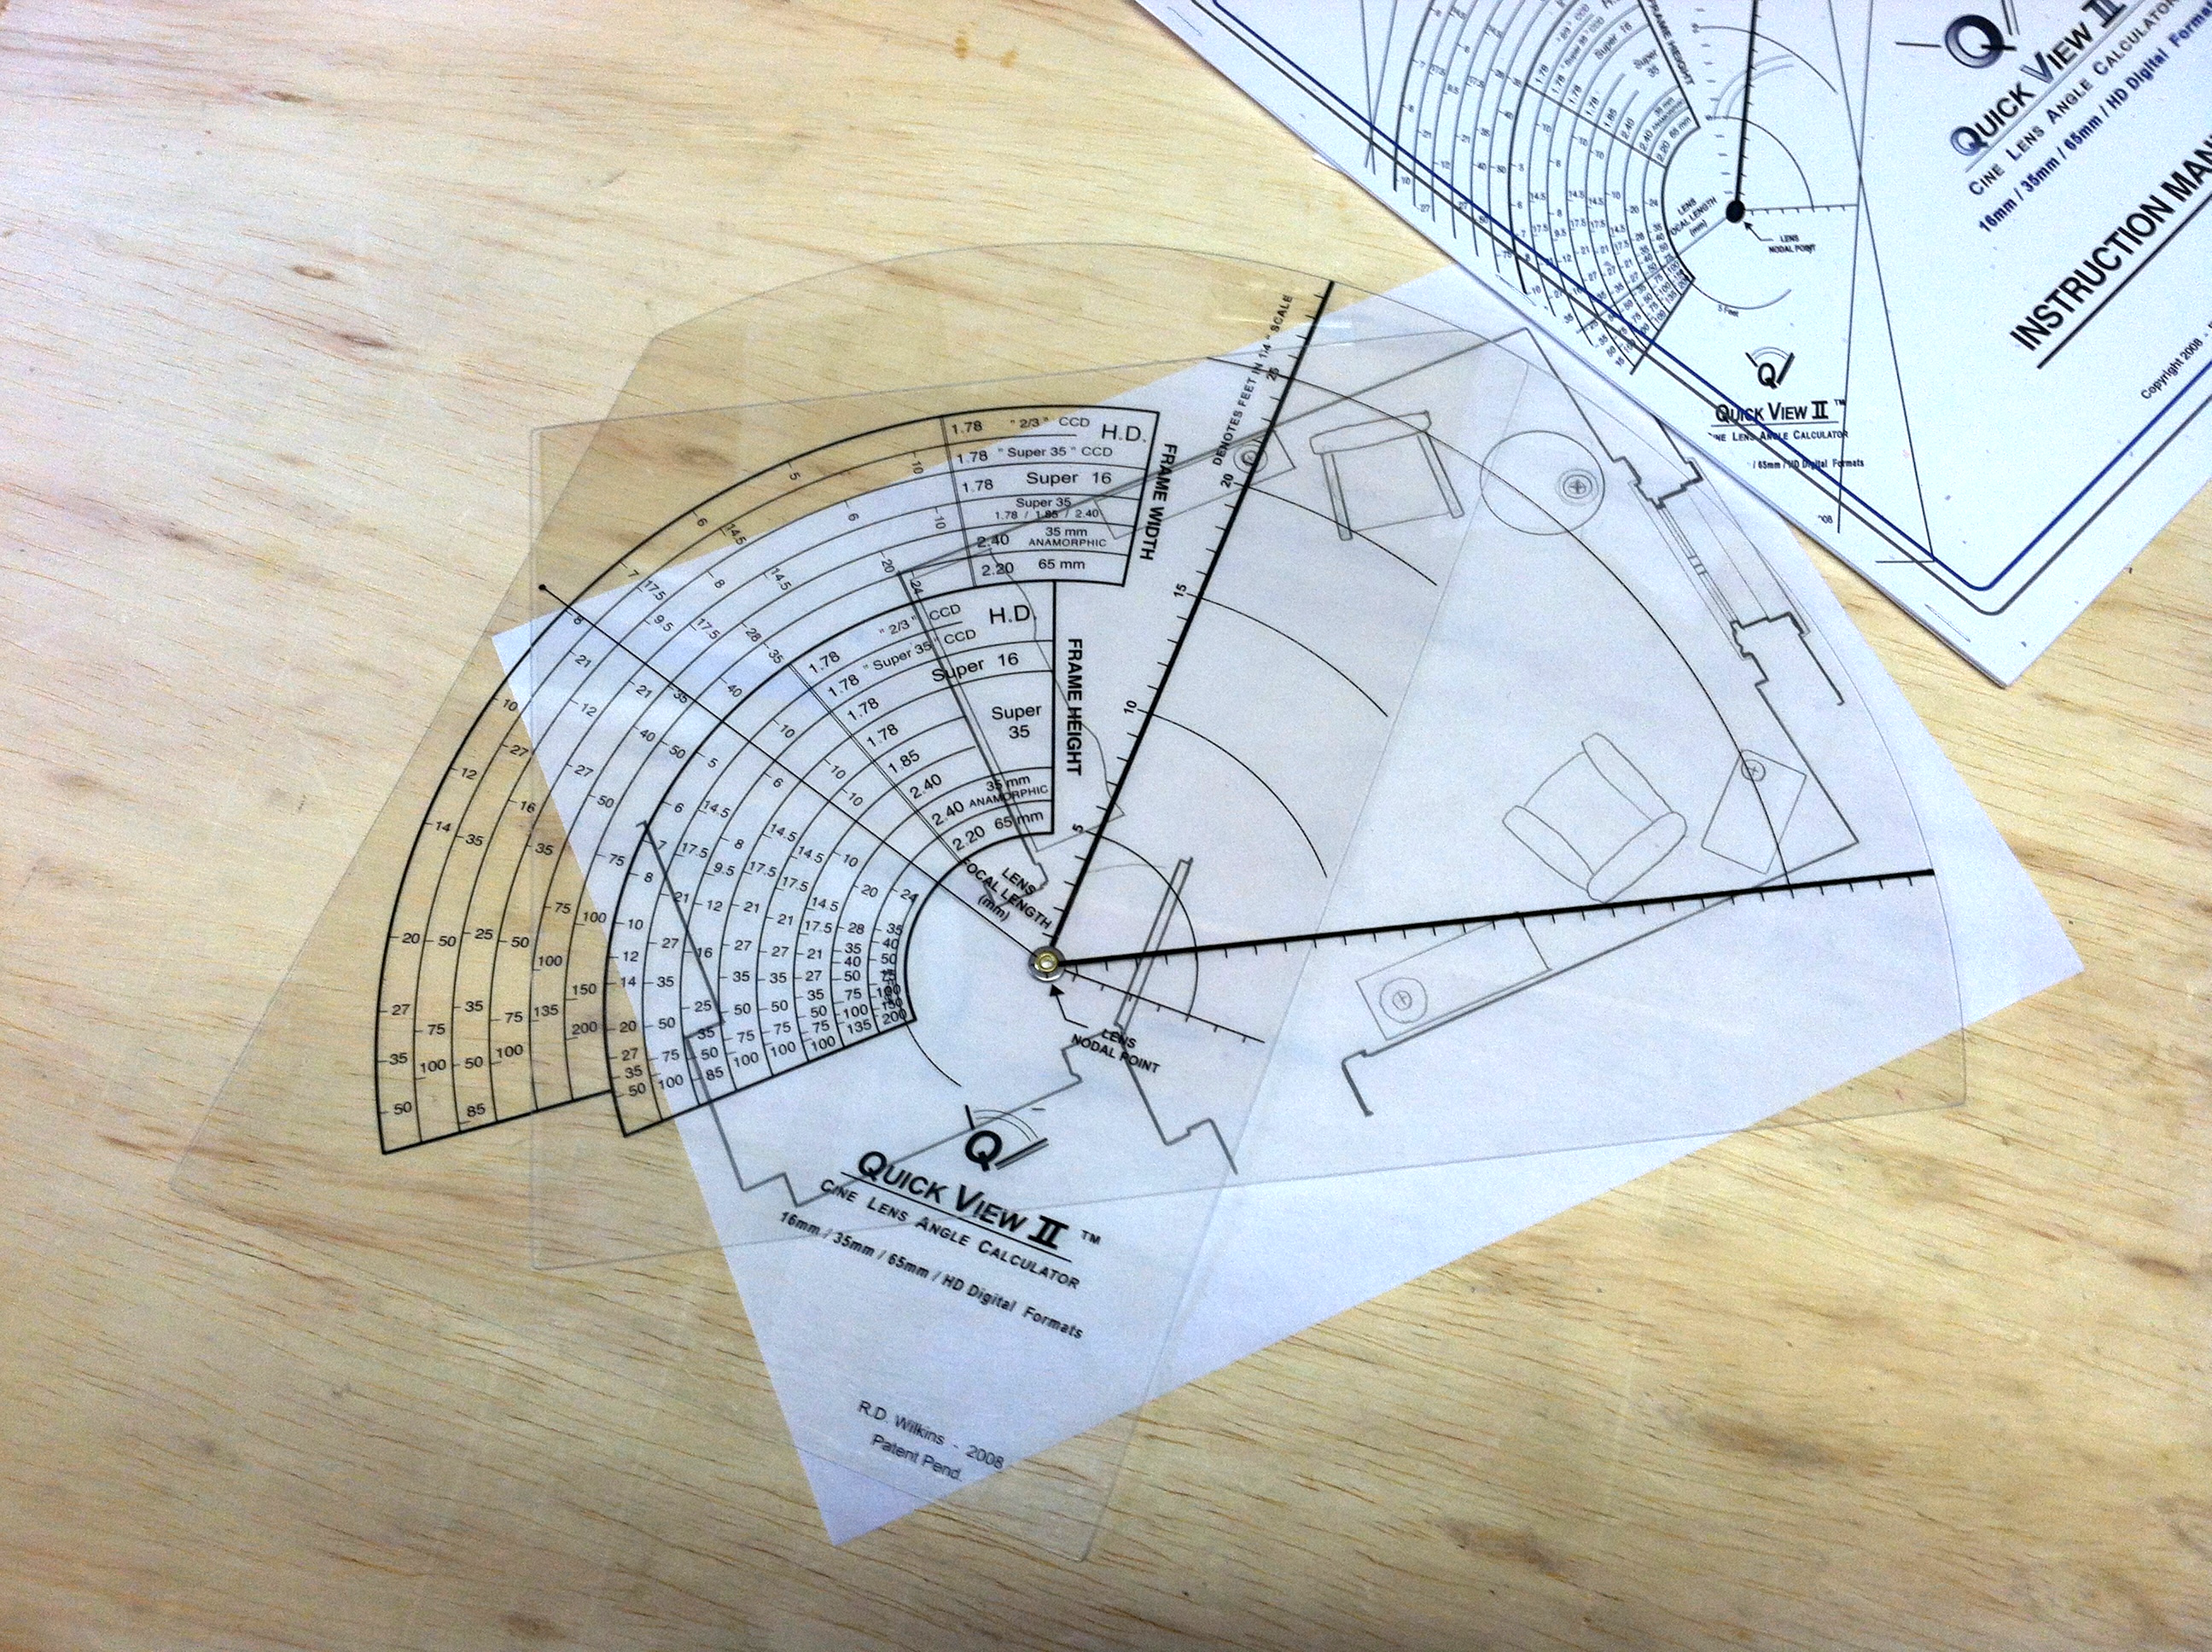
  • User Manual – you’ll get a manual with both text and diagrams that explains the concepts of the course for later reference

You will also get access to the weekly Community Lounge where you can get questions answered and meet other members of the film community.

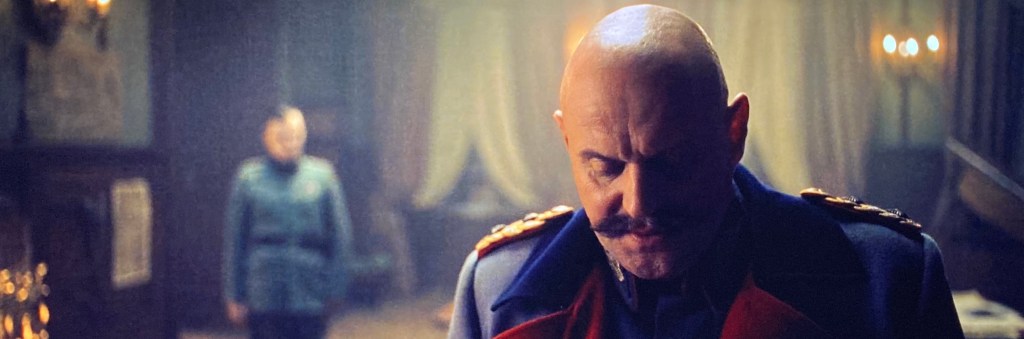
In addition, I’ve included a special section that analyzes a number of the shots from the new German film, “All Quiet On The West Front” (Im Westen Nichts Neues). which won Oscars for both Best Cinematography and Best Art Direction in 2023.

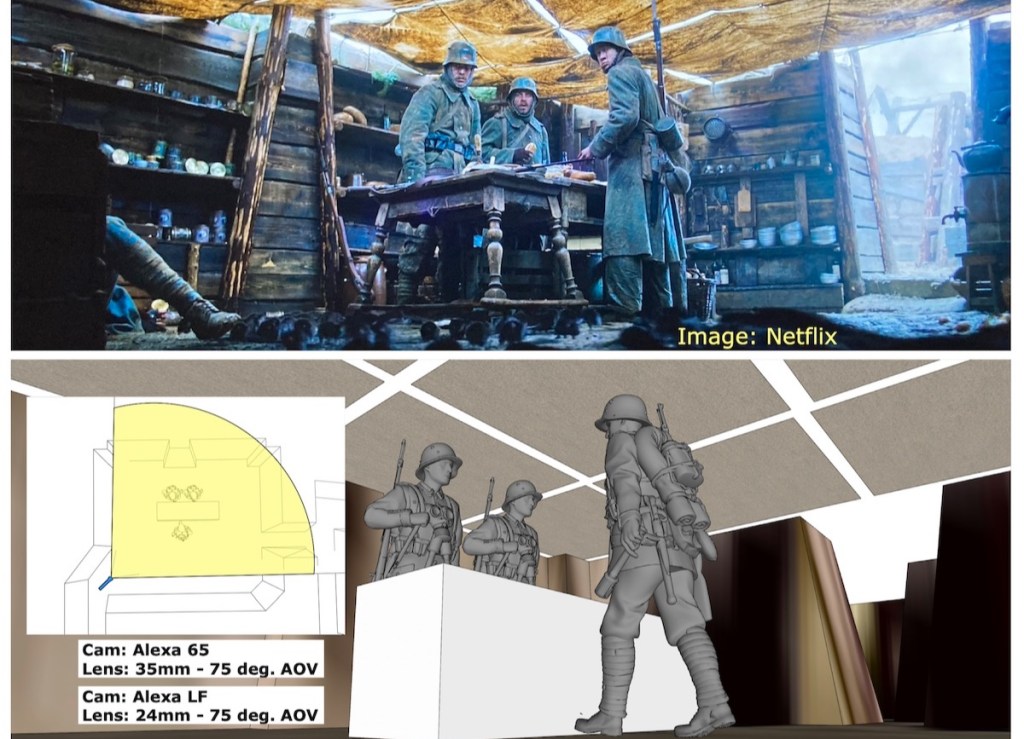
With 3D model recreations of some of the sets and locations, I’ll discuss why certain shots were difficult to get and how they achieved them. I’ll also discuss how physical locations and built sets can sometimes make shooting problematic and how careful pre-planning can avoid frustrating situations during production.

Sign Up Now

The Original Pre-Viz Tool – A DIY Lens Angle Calculator


Some of my collection of traditional studio lens angle templates. The ones on the left are for long lenses while the ones on the right are wide-angle lens. The third from the left is a zoom lens template.

Some of my collection of traditional studio lens angle templates. The ones on the left are for long lenses while the ones on the right are wide-angle lens. The third from the left is a zoom lens template.


Pre-vis Before Previs

Before the term “Pre-visualization” ever existed, there was the lens angle template. These were a staple of any Hollywood studio Art Department and were used when laying out a set to determine camera angles, backing sizes needed, rear projection screens and planning back-projected set illustrations for the producer and director to approve sets long before there were 3D computer programs.

There was a time when a basic knowledge of optics and lenses was considered mandatory and was necessary not only because the Art Director would design the sets to be shot in a specific way but this information was needed when designing effects shots such as forced perspective sets, glass shots and the like.

Todd AO template

A template for a 100mm to 300mm zoom lens in the Todd AO format. Todd AO was an early 70mm film format with an aspect ratio of 2.20.

The templates were for a single lens, usually a prime lens, and were made using 1/8″ or 1/4″ thick plexiglas. The projection lines were scratched or engraved into the acrylic, sometimes by a Set Designer but other times they were made by the studio sign shop. Some of my examples are obviously done with a hand held engraving tool while others have been done with a lettering template and have inked letters.

Todd AO lens template

Each template had two sets of projection lines, one set for the horizontal plane (for use with a plan view) and another for the vertical plane, for use with scale room elevations. Most are made for use with 1/4″ scale drawings but they are accurate for any orthographic drawing because the angle is unaffected by the scale. Most will have markings to note the distances from the lens entrance pupil in 1/4″ scale.

angle of view

The “Quick View”

By the 1990’s, there were so many different formats and lens combinations most of us in the Art Department in Hollywood carried thick manila envelopes of acetates of the various focal lengths, but I always seemed to be missing one that I needed and I found some were inaccurate from being cloned so many times. In 1998 I designed a device that had all the available formats and prime lenses  so you could just dial up the one you needed. I redesigned it in 2008 to include the digital formats but sold out of them a year ago.

I stopped having them made since they were expensive but hated to see them become obsolete since they are still so useful. For a director, they are the perfect way to see if a shot is possible at a location or see the limitations of a particular lens on a set when you can’t rely on wild walls.

Making A Quick View

Yours won’t be on Lexan like the originals were but will be sturdy enough plus cheap enough to replace if it’s damaged or lost. Download the files below and take them to your nearest copy center and have both the dial and the nomen printed on clear acetate. They don’t have to be printed at exactly 100% but they should be at the same scale to each other. Then you just line up the center marks and use a compass point or push pin to pierce the centers, creating a pivot point in place of the brass rivet as in the photo above.

The diagrams from the original instruction manual will explain how to use them. You’ll note that I’ve added a feature that wasn’t on the originals, a protractor which will tell you the angle of a selected lens.

Quick View II User Manual_2

Quick View II User Manual_3

QuickViewII_nomen

QuickViewII_dial

What Lens Is It? Comparing Apple Device Cameras To 35mm Lenses

A lot of times when you’re using your smart phone camera to take a shot of a set or location it would be nice to know what the equivalent view would be with a 35mm cinema / video lens.

I ran the numbers for most Apple devices and came up with the following equivalent focal lengths for both 35mm still cameras (full frame) and Super 35mm size sensors. Remember that although both formats are based on 35mm film stock, the frame for a still camera is a 1.5 aspect ratio with a frame width of about 1.417 inches. A Super 35mm frame is a 1.35 aspect ratio and the frame width is .980 inches.

Why only Apple? Well, the company readily makes their devices lens and sensor data available and it was easy to calculate. In the next post I’ll show you how to measure for your devices’ angle of view if the exact focal length isn’t published.

Please note in the following table the focal lengths for the given device have been rounded up to the nearest whole number so the equivalent lengths given are approximate.

Apple device lens comparison chart

Understanding RED Camera Formats & Camera Angles

In the Sketchupâ„¢ Camera Tools seminar this past weekend I talked about the current trend in digital cameras and how they relate in using camera lens angles to view 3D models and illustrations.

The RED Epicâ„¢

A camera that is creating a great deal of excitement in the camera world, and a lot of confusion in Art Departments, is the RED camera. Just over three years ago the Red Digital Cinema Camera Company  entered the market with what they called a DSMC system, or Digital Still and Motion camera system. The camera was basically a component system with the body, or brain, containing the sensor and the other various components needed to record an image. The system was designed to be configured and upgraded as the user saw best to fit their work needs. The design of a camera with dual capabilities would fuel the current trend of high-end still cameras which also record HD video, but that’s getting ahead of ourselves.

Designed with a 35mm sized chip, the camera is able to record video with the same depth of field as 35mm as well as having similar focal lengths, allowing for the use of existing lenses from other camera and 35mm systems.

The system allows the user to record in four different formats: 4.5k, 4k, 3k, and 2k and each of these can be framed or extracted in different aspect ratios. With the new Epic, whose sensor is 5k (5000 pixels across), the choices are 5k, 4.5k, 4k, 3k, 2k, 1080p, and 720p.

At this point your eyes are probably crossing and you’re saying, “so what?” Basically, what you need to know is that each successive format is a smaller cropped version of the previous one.

diagram showing a Super 35mm frame and the three extracted ratios

In Super 35mm, the frame, or negative is cropped according to the aspect ratio for the release. The difference is,  the cropping only occurs vertically. The width of all the formats is (nearly) the same, so that a lens focal length will be similar in each of them. Here is a diagram explaining the Super 35mm format from an article comparing digital and film formats that I wrote for theAug-Sept. 2010 issue of Perspective Magazine.

With RED, each format will have a narrower horizontal field of view than the previous one. Meaning that a 50mm lens in in 3k will have a much narrower field of view than it does shooting in full sensor 5k.

Below is a viewport in Sketchupâ„¢ set up using the Advanced Camera Tool pluging. The “camera” is set up for the full sensor option with the safe areas turned on for the other formats.

screen capture showing RED Camera full sensor area and 2K, 3K and 4K crop areas

In this screen shot of a model viewed with a 14mm lens, you can see how each progressively smaller ‘k’ format crops the sensor and has a narrower angle of view with the same lens. So, when you are setting up a model to view from a specific position with a particular lens, it’s important to know at what ‘k’ is the set going to be shot. Click on the image to enlarge it on your screen.

Chart of horizontal fields of view for various focal length lenses in the three different shooting formats

Here is a chart that breaks down the horizontal angle of views depending on which format the film is going to be shot in. The lenses listed are generic focal lengths and do not cover the entire range of lenses available. But, this should give you an idea of the proportional change in the horizontal angle of the captured frame based on the different shooting formats.