3 Methods Of Scaling From Photographs


photo-6In February I posted an article about using your hand in photographs as a scale reference but didn’t go into how you extract that information once you have a copy of your photos. Here are three methods, two analog and one digital, that you can use to figure out hard dimensions from objects in photos.

Equal Space Dividers

Once you have had some practice, this is the fastest method of the three, even faster that the digital method and you can use them right off a photo from a book or even a smart table screen. If you don’t have a set of equal dividers, also called 10 point dividers, you can buy a new pair for between $250 and $300 from various sites such as this one, or this one . They sometimes show up on Ebay but plan to pay around $75 to $100 for a used set.

In this photo of a 1840’s Greek revival casing, we’ll scale the actual size using the hand in the photo as a reference nomen.

IMG_6890The first thing you’ll want to do is draw lines outlining the sides and edges of the moulding details, then you’ll draw a centerline through your scale, whether it’s a hand or tape measure. Then draw a line parallel to this at the top of the picture crossing the outlines. Now continue the lines perpendicular to this new datum line so that they are parallel which eliminates the perspective/foreshortening effect of the photo. Then mark a known distance on the original centerline, in this case it’s the distance from the tip of the middle finger to the end crease which is 3 3/4″.

IMG_6886Now transfer these two points to the new datum line at the top of the photo. With the dividers, open them along this datum line allowing the distance between each point to equal 1/2″. They can represent any distance you want them to, but 1/2″ works best for this example. This means that 7 1/2 spaces will equal 3 3/4″ scale inches along the new datum.


IMG_6887Once you have these marks set, carefully move down to the bottom of the page and mark the distance at the first and last point. As each space represents 1/2″, the distance over the width of the dividers is a scale 5″ along the nomen line. For accuracy you’ll want to continuously check the spacing of the dividers against this ‘master’ to be sure you haven’t changed the setting. Most dividers are manufactured with fairly ‘tight’ joints but you can easily bump them while you’re working and throw off the setting.


IMG_6891Now we have a scale to measure the spacing between each of the line extensions above the top nomen line. You can mark the distance at the middle point and reduce the spacing of the dividers to equal 1/4″ in scale and so forth. I came up with an 8″ width, which when I checked the casing with an actual measuring tape, found it to be in reality 7 7/8″ to 7 15/16″. Not bad, well within the accuracy of most applications.


Digital Calipers

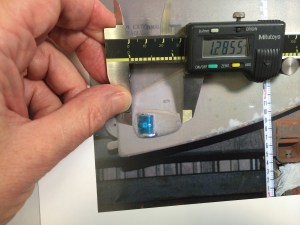
mutoh digital calipersThis method is not only more accurate than the equal space dividers but is a cheaper method as well, just not as fast at first. I have a set of Mitutoyo digital calipers which run about $180, but you don’t need anything that accurate. You’re going to be dealing with nothing finer than a thou of an inch and even that’s pushing it. A $12 pair like these are more than adequate, in fact this $9 cheap plastic pair are even better as the sharp points on the jaws of the better calipers will rip the crap out of the surface of the page of a book or the emulsion of an enlargement. They’re a lot safer to use when you’re scaling off a computer screen as well! They all have the ability to be set for decimal inches or metric.

IMG_7157The nomen in this photo is a Keson Pocket Rod, a retractable builder’s survey pole, ( don’t know if it comes in a metric version) if you don’t have one, get one right now. You’ll wonder how you got by without it. With a graduated scale in the photo it’s easy to find a correct scale. Turn the calipers on, squeeze the jaws together and zero out the reading. then you just set the jaws between a one foot increment and record the reading.

IMG_7158In this example 1 foot equals 2.665 inches. Divide this number by 12 and you come up with .222 inches equaling 1″ in the photo. Record these numbers for reference at the top of the photo. Remember that this equivalent will only be accurate over the whole area of the photo if you have been careful to make sure your camera was perpendicular to your subject matter.

IMG_7159


I could go into allowing for foreshortening and lens distortion calculations but that would take an entire chapter of a book.


IMG_7161There are other options to the survey pole or tape measure. Richard Mays introduced me to graduated adhesive tape on a movie several years ago and it’s a great tool. You can put several pieces within the frame and you’ll quickly see if you have  foreshortening issues. Art Director Jim Wallis has provided a manufacturer and source for ordering some for your kit. Or this one, Or this source for both imperial and metric with story pole writing space.

Photo Scaling With Sketchup

I know there are a number of ways to scale from photos digitally but if you pla
n to do any 3D modeling with them, Sketchup is a good place to start.Screen Shot 2015-04-09 at 4.36.35 PM
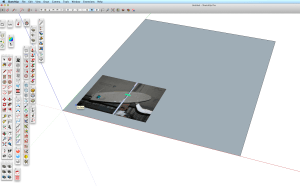
In Sketchup you’ll create a horizontal face and import your photo using file/import. Be sure to import the image as a texture. Stretch the image to fill the face and click. The image will tile itself over the face, so just trim  the excess repeated images.


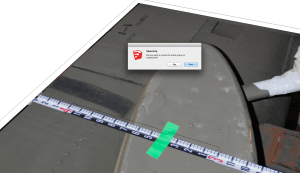
Create a Group and double-click to open it for editing. This is an especially important stepScreen Shot 2015-04-09 at 4.38.50 PM if you already have other object or images in your model file. With the Pencil tool you’ll draw a line along your nomen marking out a specific distance, in this case 12″. the longer the line the more accurate your scaling will be.


With the ruler tool, measure this line from one end to the other. Ignore what it tells you theScreen Shot 2015-04-09 at 4.38.50 PM length is. Type the length you want it to be which will appear in the Value Control Box in the lower right corner of the window. When you hit return , a box will appear asking you if you want to resize the object. Click ‘Yes’ and the object will shrink/grow to the correct size and your photo image will now be at full size scale.

Screen Shot 2015-04-09 at 4.39.50 PM


Now you can trace any area you like and the tape tool will give you a correct length, Screen Shot 2015-04-09 at 4.42.54 PMproviding you are measuring in the same focal plane as the nomen. Obviously if you are measuring something in the foreground or background the measurement will be off, which is why you need lots of survey photos  if your subject is complicated,


–  R.D. Wilkins


Protected by Copyscape Original Content Check

Rendering In Sketchup

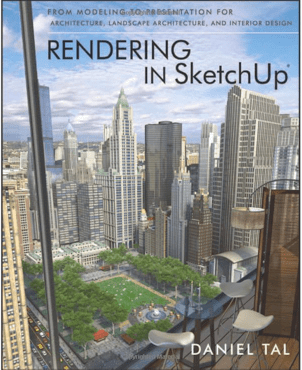
For those of you who work in Sketchup and are new to rendering, or are confused by all the different rendering software packages available, a new book is coming out March 25 that will help. Daniel Tal, landscape architect and author of Sketchup For Site Design, has written a new book, Rendering In Sketchup, which is now available for pre-order or as a digital download.

rendering in sketchup

There are now a number of rendering programs on the market for use with Sketchup, with a majority of them working from within Sketchup without having to exit the program. This can be a plus or a minus depending on how you work. Even though most of the programs offer free-use trial periods of their software, It can be pretty difficult and time-consuming to decide which is  the best one for your workflow and budget.

Daniel is an excellent teacher and has written a very thorough and detailed book on the process of rendering from Sketchup using a variety of software programs as well as explaining post-rendering work with Photoshop. While not every rendering engine is covered, he does go into a great amount of detail explaining not only the basics of rendering, but his own methods using Shaderlight, SU Podium and Twilight Render.

The book covers workflow, hardware requirements, how to model efficiently for renders, use and teaching of textures and a lot more. At over 600 pages, the book is both a reference and a guide and can be read for pertinent chapters rather than just cover to cover.

You can get more information on the book here, and you can view the videos on Daniel’s Youtube site here

Here is a really good tutorial by Daniel you should watch which is based on the material from his book:

Land8 Webinar: Rendering in SketchUp – Daniel Tal from Land8.com on Vimeo.

If you want to know all of your rendering engine options, here is a list of rendering programs that work with or within Sketchup;   ( Prices are as of March, 2013. )

From within Sketchup:

Shaderlight – $299 full license; timed access from $50

Twilight Render – $99

V-Ray – $800

ArielVision – $175

Bloom Unit – free software , cloud-based, priced per render

Caravaggio – $295

Indigo Renderer – $220

IRender nXt – $499

Light Up – $189

LumenRT – $295

Maxwell – $995

Raylectron – $99

Render[in] – $160

Renditioner –  $99,  Pro $199

SU Podium – $198

Thea Render – $420

Standalone Software

Artlantis

Kerkythea – free

The Future Of Sketchup

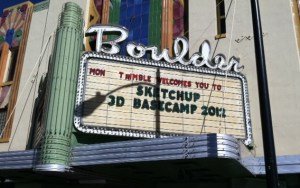
On Monday morning I, along with about 280 others, packed into the Boulder Theater in downtown Boulder, Colorado in the hope of finding answers. It was the first day of Sketchup Basecamp, a semi-annual event that attracts Sketchup users from around the world for a three-day conference that’s more like a cross between a family reunion and a college party than a traditional industry conference.

When it was announced on April 26 of this year that Google was planning to sell Sketchup, a lot of people ( myself included ) got more than a little nervous. Sketchup is the sole piece of software I use for modeling sets and creating working drawings. Since purchasing the program in 2006, Sketchup has become the most-used modeler in the world with it’s user base growing to over 30 million people. The program was obviously very successful, so why was Google selling it off when it normally doesn’t divest itself of products. The last time they had sold a product investment was in 2009. A Sketchup blog article by Product Manager John Baucus on the same day helped to allay fears but there were still a lot of unanswered questions and concerns.

Google had purchased Sketchup’s parent company, @Last Software in 2006 to provide content for Google Earth. The idea was to provide a free 3D modeling package that would allow people to create buildings for use in Google Earth. Even with a paid version of Google Earth it seems that Earth was never a profit generator for them and with the introduction of a new system which allows Google to now create models from auto-generated 3D mesh buildings from photo-grammatical data gathered from satellites and unmanned aircraft, it seems that they no longer saw a need for a 3D modeling program. There was speculation in the engineering industry that the company would be sold to Dassault Systemes, but when the announcement was made it was revealed that Sketchup would be purchased by Trimble Navigation.

Trimble Who?

So, who is Trimble Navigation and why did they buy Sketchup? It turns out Trimble is a billion dollar company located in Sunnyvale, California and is a leader in developing systems which use GPS technology for the surveying and construction industries. They have offices in over 30 countries and have over 1,800 patents relating to GPS systems. Sketchup is just just one of a number of acquisitions Trimble has made this year, including Tekla, a BIM modeling program from Europe. On Trimble’s website they describe the company as having integrated  “a wide range of positioning technologies including GPS, laser, optical and inertial technologies with application software, wireless communications, and services to provide complete commercial solutions. Its integrated solutions allow customers to collect, manage and analyze complex information faster and easier, making them more productive, efficient and profitable.”

Far from dumping the software in a fire-sale, Google wanted to make sure Sketchup went to a good home. Google had a previous relationship with Trimble having used their GPS systems in developing Google Earth.

Trimble Vice President Bryn Fosburgh was there in Boulder at the opening session to explain how they saw Sketchup’s position in the company’s structure. Having established itself in the engineering and construction side of the industry, the acquisition of Sketchup is seen as a way of extending the firm’s footprint into the design phase of the industries as well. He said they saw the modeling company as becoming seamlessly integrated with the other companies’ software and hardware products and said his only surprise after the purchase was getting used to the unusual dog-rich environment of the Sketchup offices.

Users of their products like the Robotic Total Station will be able to bring the file from a Sketchup model of a house into the device and have it’s laser lay out the corners of the building with 1 centimeter accuracy.

More Tasty Sketchup Biscuits To Come

A problem most companies have is learning when to leave acquisitions alone. Much like biscuits, where over-handling the mix leads to leaden,  inedible lumps. Trimble seems to have a record for buying quality companies, integrating them into the family, and then leaving the work to the people that know best how to implement it.

Joined on stage by Sketchup Product Manager John Baucus, Product Evangelist Aidan Chopra and a number of others from the company, the group quickly explained the plans Trimble has set for the 3D modeler: the program is going to stay simple to use, and it’s going to get a lot more complex as well. The company sees Sketchup as a platform as well as an application.

Here’s the abbreviated breakdown:

– There will always be a free version of Sketchup available and the basic program will     never be more complicated to learn.

-The Pro version will continue to be developed and you will see a continually greater difference between it’s abilities and those of the free version.

-They will continue to support 3rd party developers in creating compatible software and plugins to work within Sketchup. Over 45% of users have and use 3rd party plugins with Sketchup and they want to continue to support the creation of useful additions that they would never develop in-house, hoping that each industry will take the initiative in creating plugins for specific needs.

-They will continue to support “everyone else” as well. Since the program is used in so many varied industries and vocations, the company wants the software to be truly useful to anyone who uses it to create.

-They plan to continue to make the software run bigger and more complex models as fast as possible by any means they can.

-The company is ramping up their team size and is currently looking for new talent. Trimble is pumping a lot of money into the company, especially in Layout, their software for creating construction drawings from Sketchup models. They plan on continuing to improve the drawing program to equal any CAD package out there.

-Starting in 2013 with the release of the next version, the company will now go to annual updates instead of the random release dates we’ve become used to. Another sign that the software’s development is going to proceed at a much faster rate than it did at Google.

Also, there are plans to overhaul the 3D Warehouse. The Warehouse now contains over 2 million models with over 1000 new models added each week, many by major manufacturers. They plan to update it to make it easier to use and easier to find content.

And, it was announced that the company has developed an STL importer/exporter for creating model files for use in stereolithography and 3D printing. Now that companies like Makerbot have made desk-top 3D printers available in the $2000 range, 3D printing may soon become as common as paper printers.

They have licensed STL plugin code from three outside developers, streamlined it and offer it as a free plugin. You can download it here.

All in all, the switch to Trimble ownership looks like a much better fit than it did with Google. Although as John Baucus will say, plenty of good things came from the Google purchase. It was at Google that the free version of the software was launched and the 3D Warehouse came into being. And, kudos to Google for making sure the company went to a good new home and wasn’t just cut loose.

I don’t think I’m alone in saying that I left the conference relieved. It looks like Sketchup has a very long and productive future ahead. Aidan Chopra joked at the opening session, “Sketchup 17 is going to be awesome!”

P.S. – Your Rendering Software Is Obsolete

An article at PC Magazine.com last November talked about how real-time rendering is changing the movies, mainly in terms of how it affects the workflow and the time involved in creating animated films. Because of the advances in processor speeds and the continuing evolution of software programming, animators are beginning to be able to animate in real time. The giant rendering farms of the Far East may soon be a thing of the past.

Creating renders, at least for me, is a tedious affair that ends up eating hours of time while processing images, and renders ( pun intended ) my computer a slave to the rendering engine, useless for working on anything else.

The new wave in rendering software is for real-time execution with full motion and lighting effects as well as physical atmospheric effects like water, fog, etc.

While not cheap, there are a number of real-time, full motion options that cut the normal still-image render time from hours to seconds.

LumenRT

The least expensive option I’m aware of is LumenRT. This is a real-time rendering engine designed for use with Sketchup, but is currently being developed for use with other modeling software. Unlike the other programs I’ll discuss, there is a calculation process involved that does take more time but the advantage of this is that you can output what is called a LiveCube, which is an executable file you can send to anyone that they can navigate in and explore the model without the need for any software. Pretty neat. The downside is that once this is done, if you make any changes you need to recompute everything.

The program boast very accurate lighting and reflection effects and this affects the render speed. The company’s site advises that you may experience slower processing speeds if your model exceeds 40,000 square feet or 500,000 polys.

Normally price at $295, the program is currently on sale for $195 at their site. You can watch a promo film below, and read a review of it here.


Lumion

The next option is a program called Lumion, which was designed based on the object-oriented analysis approach of Quest 3D, a virtual reality program designed for 3D fly-throughs and simulations.

Lumion’s interface

Lumion is a true real-time rendering engine that can import nearly any 3D model. Instead of using ray-tracing technology like most other renderers, it uses a system more like those found in gaming systems to simulate light effects. This would seem to suggest that the specular effects and reflections are not accurate but a viewing of several sample videos of the product seems to suggest otherwise. Because of the way the program operates, objects in the background are rendered at lesser resolutions meaning it can handle models with millions of polys without bogging down.

The program is touted as having a short learning curve and is able to generate full motion renders in a fraction of the time it once took to do them in programs like Maya.

Lumion isn’t cheap by any means. The price of the basic program is about $1,900 with the pro version running about $3,700. There is a free version, which is limited and there is a trial version as well. It also runs only on the Windows operating system. Check out the amazing promo videos below and read the reviews here and here.

Lumion quick overview from Lumion on Vimeo.

Waterfall Lumion techpreview from Lumion on Vimeo.

Lumion demonstration from Lumion on Vimeo.

Twinmotion 2

Twinmotion 2 bills itself as “the render killer”. It was developed by an architectural film as an in-house application but was made available to the public. Like Lumion it is capable of handling huge models because of its Level Of Detail technology that renders distant objects with less detail and increases the poly count as you move closer to them.

Twinmotion 2 interface

Twinmotion seems to have more accurate geo-locating controls as well as sun controls, but Lumion is constantly changing so that may no longer be the case. Twinmotion does create excellent renders as seen below in this side-by-side comparison of a render to actual film of the location.

At $2900, Twinmotion 2 is in the same range as Lumion. Plus, there is a $850 annual subscription fee, similar to Revit. It’s hardly a purchase one could take lightly.

So what does this mean for the Art Department? Do we need full-motion renders? Considering that renders are becoming more and more common at each step of the design process, creating full-motion renders that can be done in a fraction of the time of traditional renders might become the norm.

Maybe that’s not such a bad thing. Maybe they could provide a good transistion step into the pre-viz process. Or maybe they’ll bring some of the pre-viz work back into the Art Department.

What do you think?

Sculpting Tools For Sketchup

Most people think of Sketchup as a program that just draws boxes. As a poly-modeler it was always handicapped when it came to modeling compound curved surfaces and even with the built-in Sandbox tools, drawing terrain was never truly easy.

Now there are two different plugins that make not only terrain construction but organic and vehicle construction possible without having the urge to jump out the nearest window. I use both regularly and because they each have different attributes, I think their capabilities really complement each other when you are constructing complex shapes.

Artisan

The first is a plugin called Artisan which is a great solution for creating organic shapes. Created by Dale Martens, who has produced numerous other free plugins including Subdivide & Smooth, has created a set of sculpting tools that work very much like the sculpting tools in Maya and are incredibly easy to learn and use. The site has nice tutorial videos as well as a nice gallery of others work using the plugin. You have a series of settings which allows to to adjust the pressure of the brush, either positive or negative, and after setting the width of the ‘brush’, you drag it over the area to create the sculpted surface. The demo video below will give you an idea of the process.

One of the tools that alone is worth the $39 cost, is a poly-reducer which is a huge help when you import models from a NERB software package like Rhino or Maya. The tool allows you to select how much you want to reduce the poly count of a model to get it down to the size you need. You can also reverse the process and take a low-poly model and increase the detail.

I consider this plugin to be an absolute must for people who want to be able to build anything besides flat walls in Sketchup. Here are some examples of Sketchup models created using Artisan:

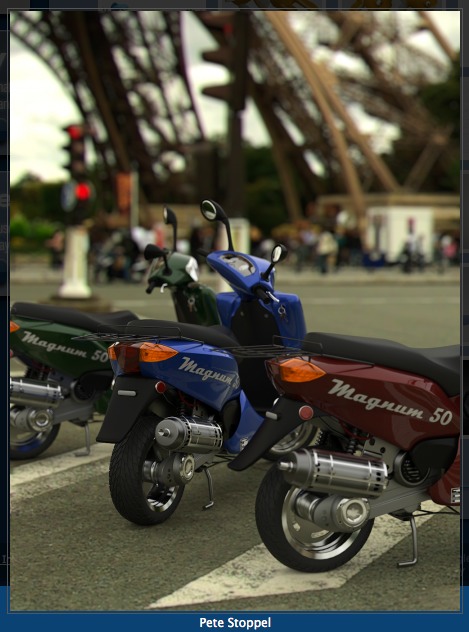
scooter by Pete Stoppel using Artisan

Motorbikes by Pete Stoppel

creature by Erik Lay

terrain by Pete Stoppel

Vertex Tools

The other plugin is called Vertex ToolsThis program has tools which work differently than Artisan but has some advantages over it in the way the selection tools work. Designed by Thom Thomassen, a modelmaker from Norway who has also designed an incredible number of other useful free plugins, has designed a set of tools that are what the Sandbox Tools aspire to be.  At $20 it, like Artisan, is a real bargain. The video below will give you a quick overview.

The selection tools allow you to set how the tool affects the surrounding polys with either a linear or cosine fall-off. This one is really a must when you are creating terrain.

At a total cost of $59 dollars, these plugins will give you a huge boost in your modeling capabilities. If you use Sketchup, they should be your next purchase. You won’t be sorry.

Understanding RED Camera Formats & Camera Angles

In the Sketchup™ Camera Tools seminar this past weekend I talked about the current trend in digital cameras and how they relate in using camera lens angles to view 3D models and illustrations.

The RED Epic™

A camera that is creating a great deal of excitement in the camera world, and a lot of confusion in Art Departments, is the RED camera. Just over three years ago the Red Digital Cinema Camera Company  entered the market with what they called a DSMC system, or Digital Still and Motion camera system. The camera was basically a component system with the body, or brain, containing the sensor and the other various components needed to record an image. The system was designed to be configured and upgraded as the user saw best to fit their work needs. The design of a camera with dual capabilities would fuel the current trend of high-end still cameras which also record HD video, but that’s getting ahead of ourselves.

Designed with a 35mm sized chip, the camera is able to record video with the same depth of field as 35mm as well as having similar focal lengths, allowing for the use of existing lenses from other camera and 35mm systems.

The system allows the user to record in four different formats: 4.5k, 4k, 3k, and 2k and each of these can be framed or extracted in different aspect ratios. With the new Epic, whose sensor is 5k (5000 pixels across), the choices are 5k, 4.5k, 4k, 3k, 2k, 1080p, and 720p.

At this point your eyes are probably crossing and you’re saying, “so what?” Basically, what you need to know is that each successive format is a smaller cropped version of the previous one.

diagram showing a Super 35mm frame and the three extracted ratios

In Super 35mm, the frame, or negative is cropped according to the aspect ratio for the release. The difference is,  the cropping only occurs vertically. The width of all the formats is (nearly) the same, so that a lens focal length will be similar in each of them. Here is a diagram explaining the Super 35mm format from an article comparing digital and film formats that I wrote for theAug-Sept. 2010 issue of Perspective Magazine.

With RED, each format will have a narrower horizontal field of view than the previous one. Meaning that a 50mm lens in in 3k will have a much narrower field of view than it does shooting in full sensor 5k.

Below is a viewport in Sketchup™ set up using the Advanced Camera Tool pluging. The “camera” is set up for the full sensor option with the safe areas turned on for the other formats.

screen capture showing RED Camera full sensor area and 2K, 3K and 4K crop areas

In this screen shot of a model viewed with a 14mm lens, you can see how each progressively smaller ‘k’ format crops the sensor and has a narrower angle of view with the same lens. So, when you are setting up a model to view from a specific position with a particular lens, it’s important to know at what ‘k’ is the set going to be shot. Click on the image to enlarge it on your screen.

Chart of horizontal fields of view for various focal length lenses in the three different shooting formats

Here is a chart that breaks down the horizontal angle of views depending on which format the film is going to be shot in. The lenses listed are generic focal lengths and do not cover the entire range of lenses available. But, this should give you an idea of the proportional change in the horizontal angle of the captured frame based on the different shooting formats.

Camera Tools For Sketchup Pro

( Note: There is a half-day seminar on using the Camera Tool plugin on January 15 in Sherman Oaks. The cost is $50 but ADG members get in for $25. See the site below for more details: )

http://www.insidetheframe.biz

Years ago Sketchup developed a plugin for the industry called the Film & Stage plugin which allowed you to view a model with a set aspect ratio and allowed you to control the focal length of the viewing window.

The plugin was never updated for newer versions and was eventually put aside once the company was acquired by Google. Many of us have moaned for years, begging for an update. I devised a way of setting the view window to get a correct view with specific focal lengths, but it was a tedious process and a painful one to try to demonstrate to others.

In March Sketchup released a completely retooled version of the plugin that was everything I had hoped for and more. The new plugin, now called Advanced Camera Tools allows you to view your model with virtually any camera now available with any aspect ratio and with any focal length you choose. There is even a method of adding new cameras.

Nearly every camera in use in the industry is included with the pre-sets as well as all the RED cameras.

Aidan Chopra, product evangelist for Sketchup told me that updating the plugin really hadn’t been on the company’s radar until they held their semi-annual Basecamp last year in Boulder. The event was attended by Local 800 member Brad Rubin who pitched an update to them at that time. While it still didn’t make it onto their hotlist, the idea was intriguing to one of their software engineers, Brian Brown. The company offers to let their employees use 20% of their time working on side projects and Brian decided to use his time reworking the old Film & Stage plugin. So, we really have Brian and Brad to thank for making these tools available again.

While the plugin is as intuitive to use as Sketchup, there are things about the plugin that work differently when you are working inside it as opposed to the normal Sketchup tools.

The plugin is free, but works only with Sketchup Pro versions.

You can get it here:   http://sketchup.google.com/intl/en/download/plugins.html

With a little effort you can quickly save multiple camera views and know that they are fully editable without having to create entirely new views if the lens or camera information changes.