Arch-Anatomy – Wood Bricks

This is the first of a series of articles on the anatomy of architecture which focuses on construction details. Many of them are details that are now obsolete because of modern building methods or the evolution of designs due to changing tastes.

(An expanded explanation of an obscure but interesting entry in the Wrand Film Design Glossary.)

If you try to search for ‘wood bricks’ on the internet, you’ll probably come up with some strange answers. They were a standard feature of brick construction in the nineteeth century that went out of fashion for a number of reasons.

With masonry building construction there has always been the problem of attaching wood elements to stone or brick structures. This was often accomplished by inserting wood plugs into the wall surfaces as an attachment point for nails, or by driving nails into the mortar of joints.

A wood plug in a stone wall of a 17th century Paris hotel.
From a 19th century builders manual showing the use of wood plugs for attaching a door frame.
Wooden plugs in early 20th century brick.

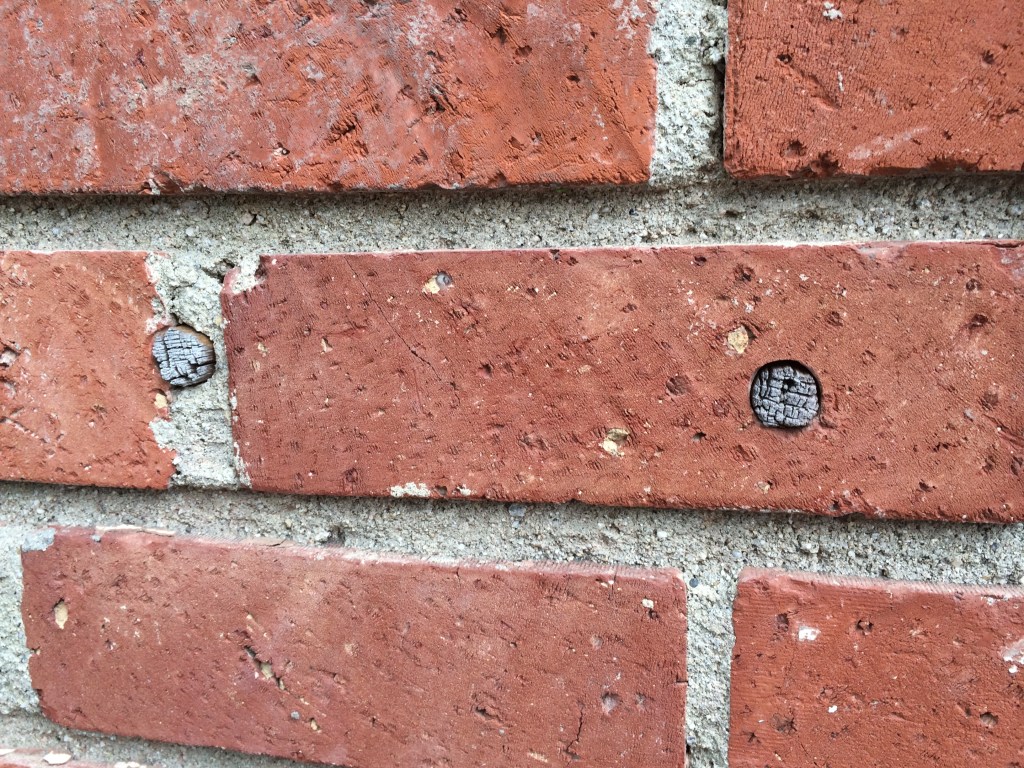
The use of ‘wood bricks’ most likely evolved in England before spreading to America. Most building manuals of the period that mention their use suggest using well-seasoned hardwood billets set between the brick courses at intervals for a way of attaching the wood linings for doorways and window framing.

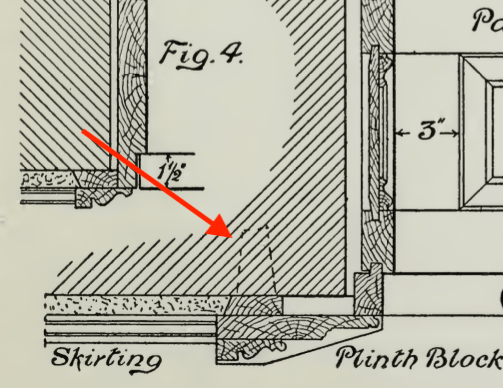
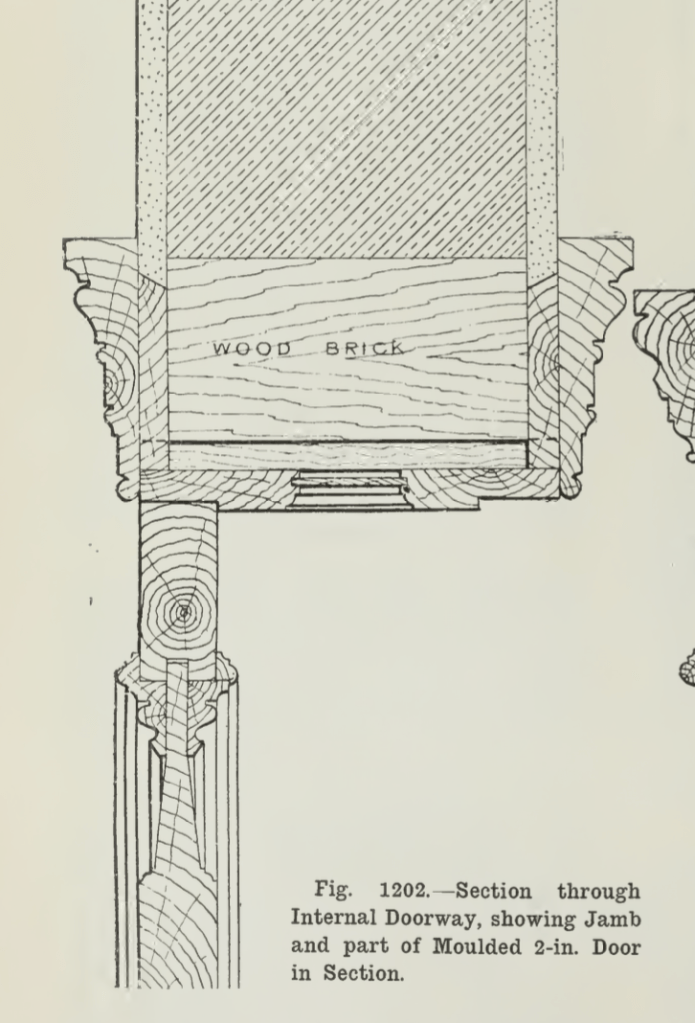
For narrower wall opening, this lining could consist of a single board like in the illustration below.

Use of a single plank as a door frame lining for a brick wall. Note that the wood bricks are also used to attach the grounds at the door frame for plasterwork. The architrave exhibits typical Neo-colonial profiles, while the bolection mould on the doors frame is a mould typical of Greek Revival houses, a quirked Greek ogee and bevel combined with a fillet and cove, topped with an astragal, fillet, and cove.

For larger openings in thicker walls, the wood bricks were made longer and the linings were made of several pieces of sawn and planed boards, assembled in what was called a skeleton framed jamb.

The skeleton frame is attached to the wood bricks as well as the wood lintel.

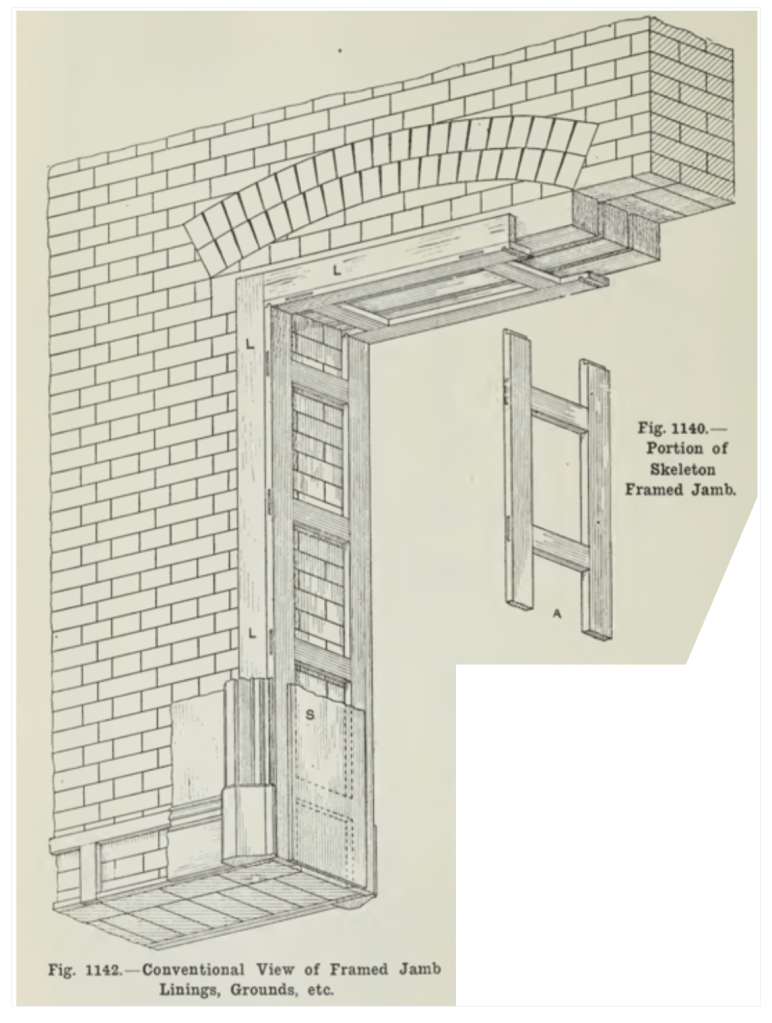
Early manuals show this framework to be mortised and tenoned similar to a frame for furniture, but some mid-ninteeth century examples in America have been observed to be simple vertical boards nailed to the wood bricks rather than a M&T frame. This method would have definitely cut down on the construction time.

The image on the left shows the wood bricks in place while the image on the right shows the vertical boards nailed to them to act as the arch frame lining. Notice the archway lining at the top with boards that have been kerfed at regular intervals to allow the wood to form to the brick archway without having to steam bend them.

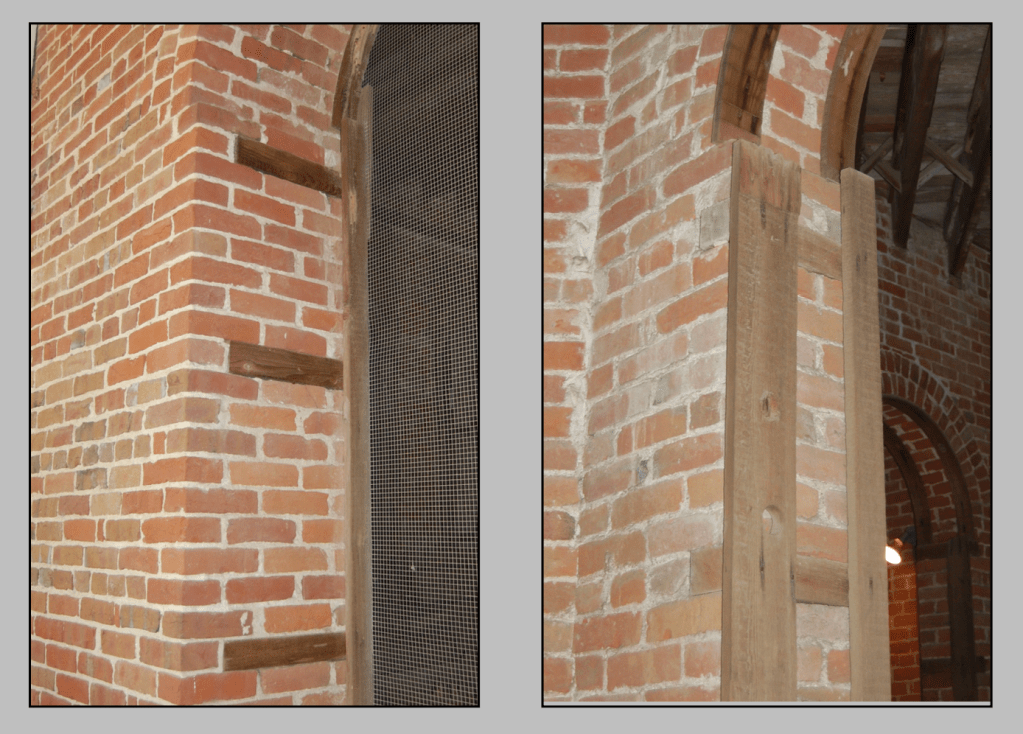
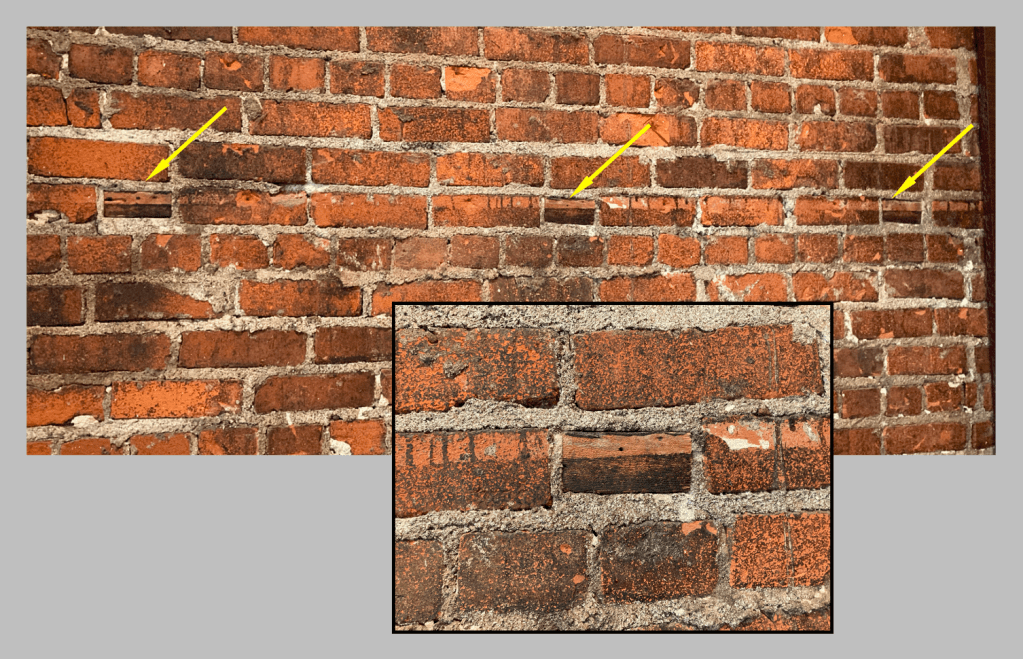
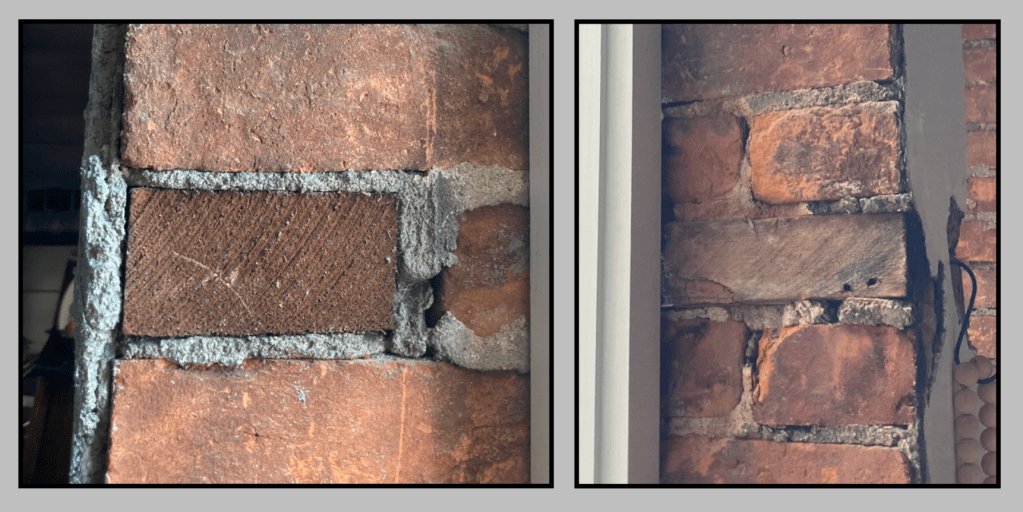
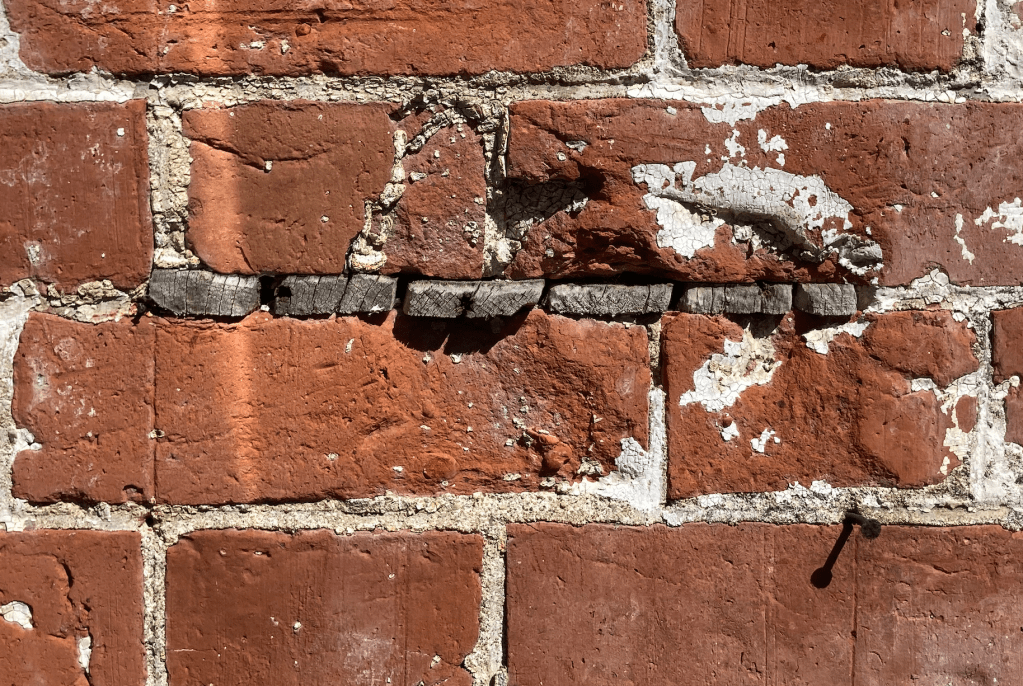
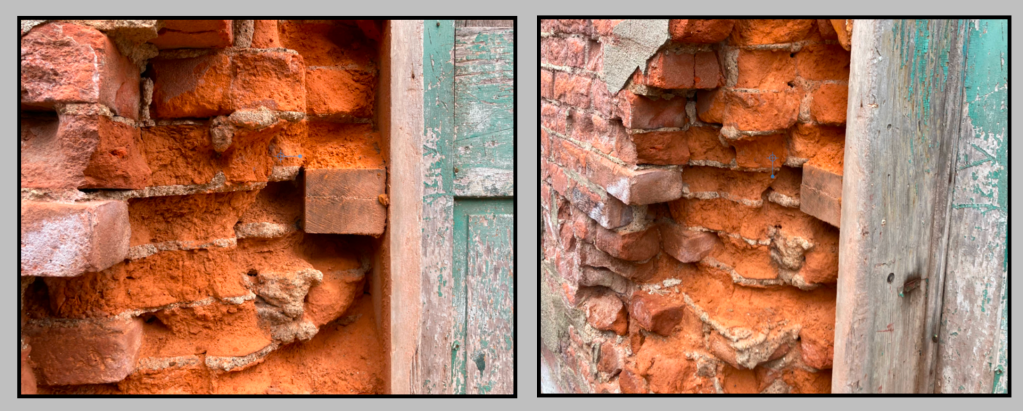
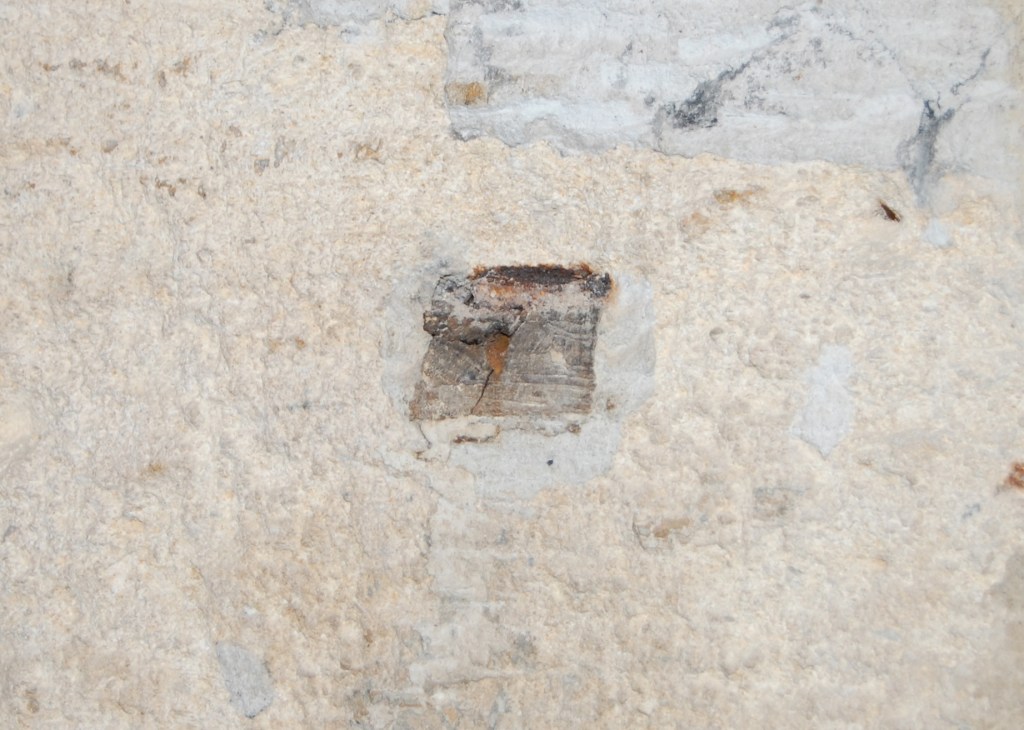
Some turn-of-the-century buildings display a more haphazard approach to wood bricks where framing cut offs of softwood were used instead of hardwood, as in the photos below.

Softwood framing cut-offs used in place of hardwood.
From an early 20th century building in Southern California. Wood bricks are set at 4′ from the floor. Most likely for a wanescot and chair rail.
Long strips of wood inserted in the brick for attaching a paneled wall detail in a 1870’s rural school house.
Two more examples of what appears to be framing lumber used as wood bricks.
Pieces of what seems to be lath for plaster inserted into the mortar joints between bricks as an attachment point.
An unusual sight I found on a building in the Mid-west. The exterior brick wall has eroded to the point that the wood bricks of a door frame have been exposed to the outside.

What Is A “Double Dap” Hinge?

One of the reasons that I wrote the Wrand Film Glossary was to record many of the obscure film and entertainment industry terms that get passes down orally but are never recorded.

Art department and set construction lingo is usually not included in the typical film glossary, and “Double dap” is one of those odd terms that you will hear used by Prop Makers* but have probably never had it explained.

The term refers to how the hinges of a door on a stage set are to be installed. Normally the installation of hinges for a door involves creating mortises in the door stile and the jamb that match the thickness of the hinge leaves. That’s referred to as a “single dap” installation. (Note: this is specifically for doors in North America or the UK. Many Continental European doors are half-overlay and don’t use the type of leaf hinges that are standard here.)

Typical hinge installation – referred to as a Single Dap

A “double dap” installation involves creating a mortise in the door which is twice as deep as usual and not making a mortise in the jamb, as shown below.

Example of a Double Dapped hinge

The diagram below is a side-by-side plan view showing both types of installation.

So what’s the purpose of this? Well, this is something that is more typical on sets for a broadcast show than on sets for a feature film.

One advantage is speed. We tend to build sets at a pretty brisk pace, sometimes building an entire set over a weekend. For example, if you have a set with six doors, that means you need to install 18 hinges, which means routing 32 mortises. With a double dap installation you cut that number in half.

Another advantage is if you are redressing a set and need to change out the door of an opening for a different door. With a standard installation, you will need to patch and fill and re-rout three mortises. Instead you just need to fill some screw holes.

This is also the case if you need to change the swing direction of a door at the last moment. (Good luck prying off and repositioning that door stop.)

Double dapping has fallen out of favor lately. Production Designers don’t like the look of it for one thing. (Along with Phillips head screws on a period hinge!) They tend to stick out particularly when the hinges are a contrasting color from the jamb or if the wood is painted a light color and the hinges have a dark laquer/black finish. In some instances this condition can either visually hide the extra mortise depth or accentuate it.

Also, notice the round corners on the hinges in the photos. Round corner hinges are a 20th century invention to speed up production. Once machinery, i.e. routers, was being used for mortising, it became a lot faster to create hinges with leaves that didn’t require squaring off the mortise corners as was necessary for period, square hinges. Round corner hinges come in 1/4″ and 5/8″ radius corners, so be aware of what radius size they are if you’re choosing hinges for a door that has already been mortised.

Note: Prop Maker is a designation for a union stage carpenter in Los Angeles to differentiate them from a ‘civilian’ carpenter. They are trained it building theatrical scenery of all types and historical periods and specialize in creating scenery for film productions. They are more similar to cabinet makers than a typical carpenter and are skilled in construction techniques and methods that would baffle most people outside the entertainment industry.